Video.
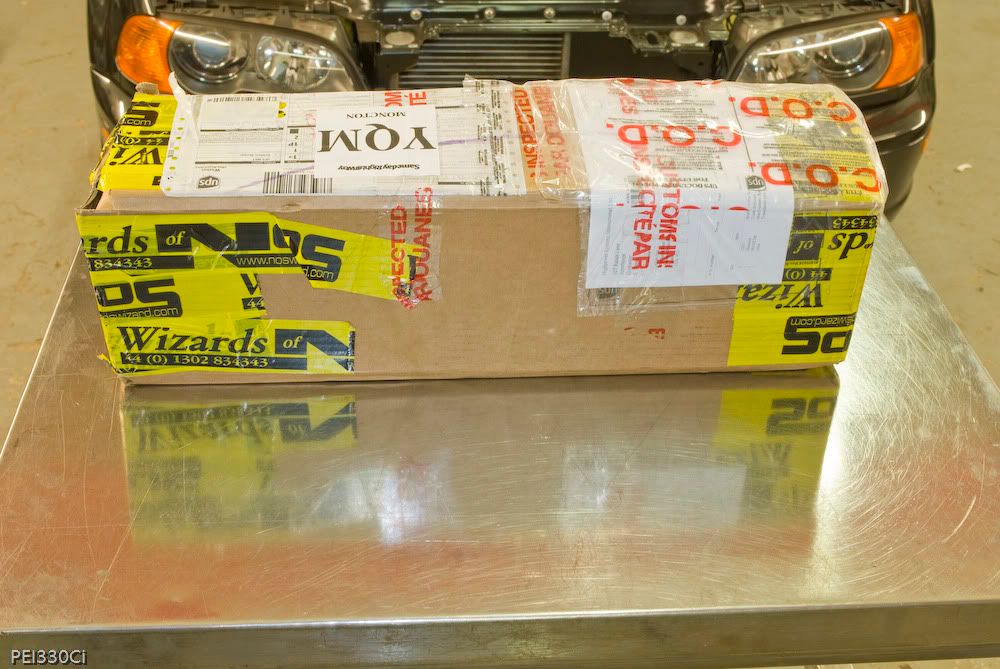
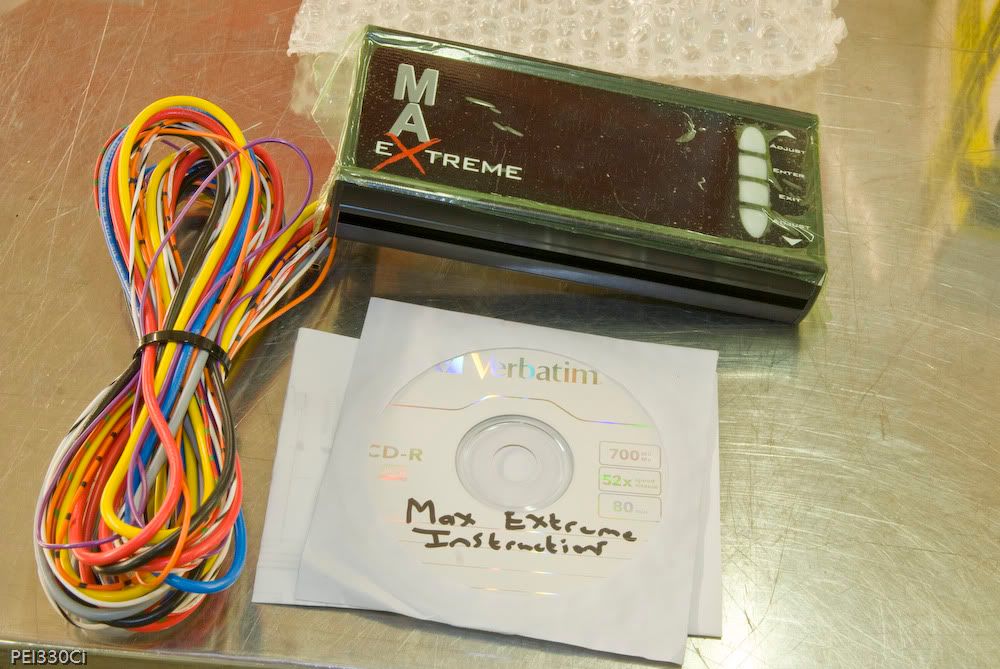
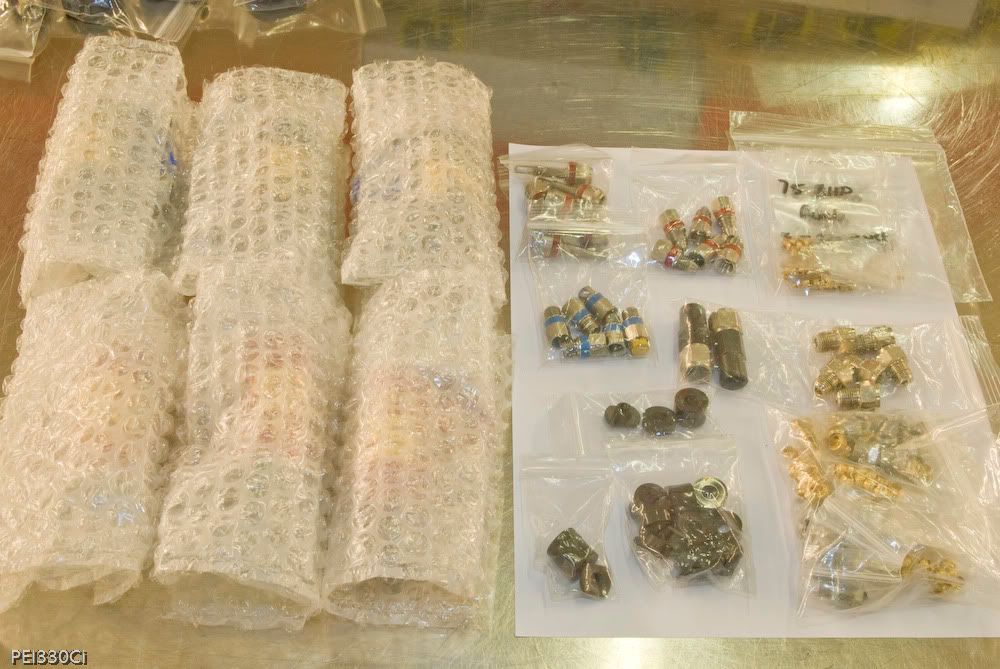
PEI330Ci wrote:The goods as they arrived:
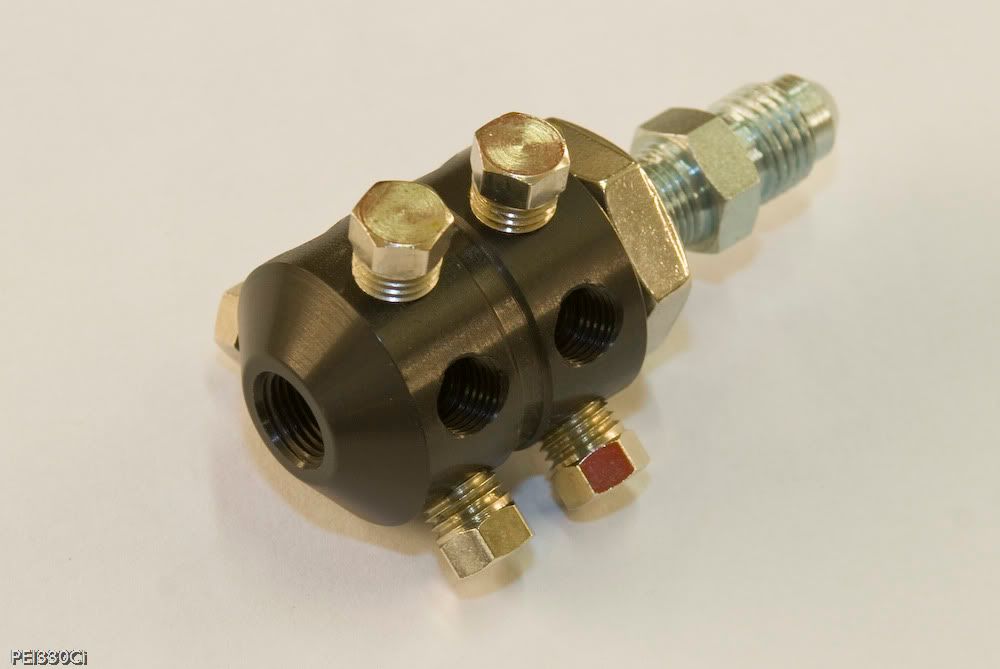
This is the master distribution block:
It splits fuel and nitrous up to 6 ways each, and uses an optimized internal geometry to maximize flow and minimize cavitation.
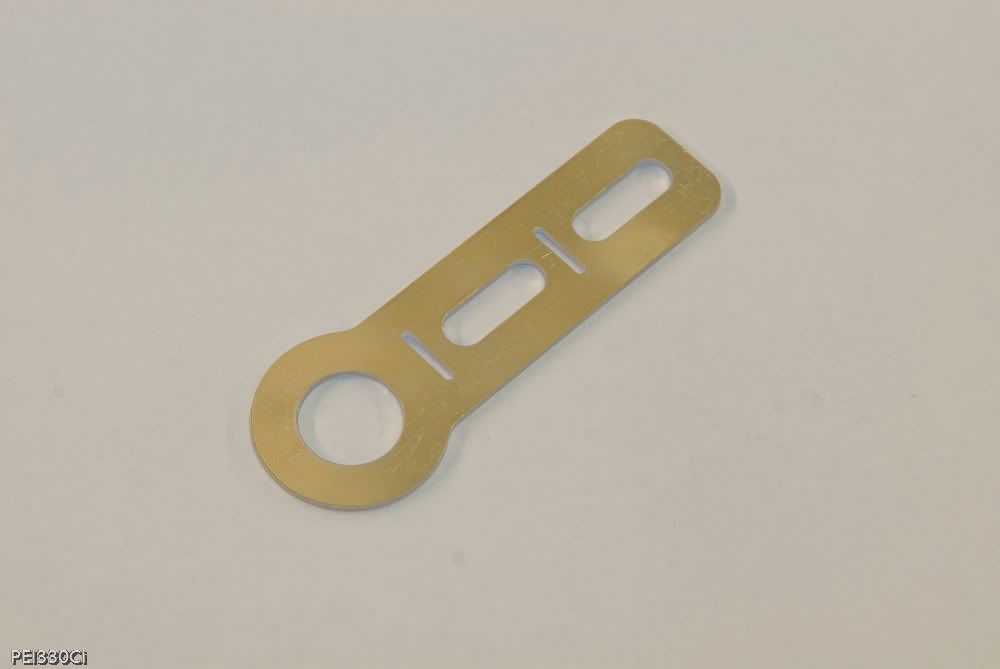
The mounting bracket for the above D-block is laser cut and polished stainless steel:
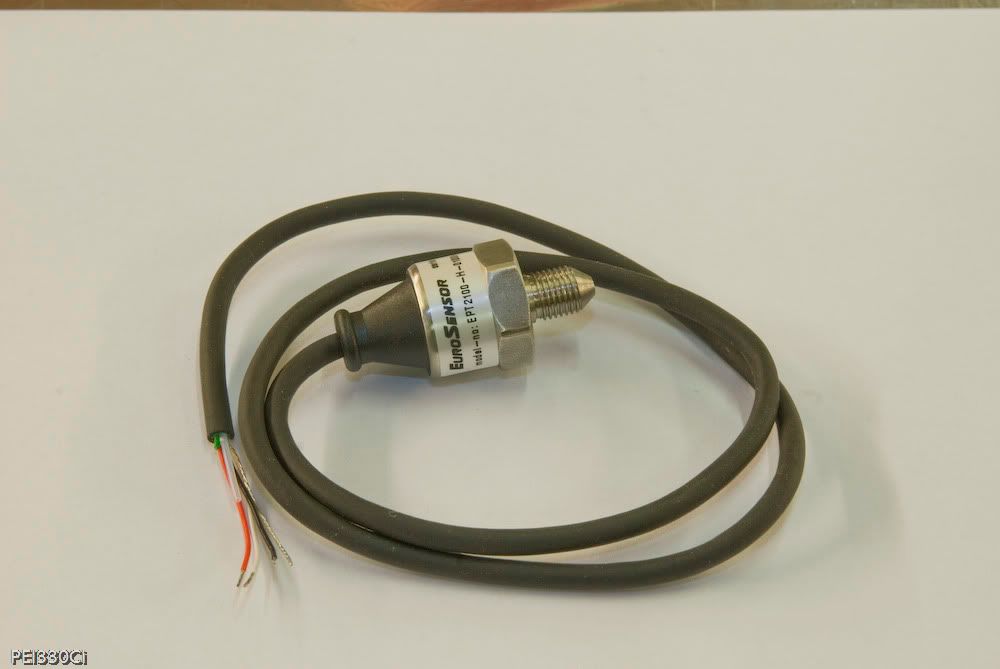
Fuel pressure transducer:
This is a pressure sensor, not a pressure switch. When connected to the Max Extreme Race nitrous controller, it allows real-time monitoring of fuel pressure as well as a system emergency shut-down/alarm if the pressure drops below a programmed threshold. In contrast, the pressure switch in my NX system (Hobbs switch) only offers an ON/OFF feature, and must be mechanically adjusted from outside the cockpit.
Nitrous pressure transducer:
Certainly a high quality piece, this allows real-time monitoring of nitrous pressure through the Max Extreme Race controller, programmable control of bottle heaters, and a system shutdown/alarm if pressure exceeds a programmed threshold.
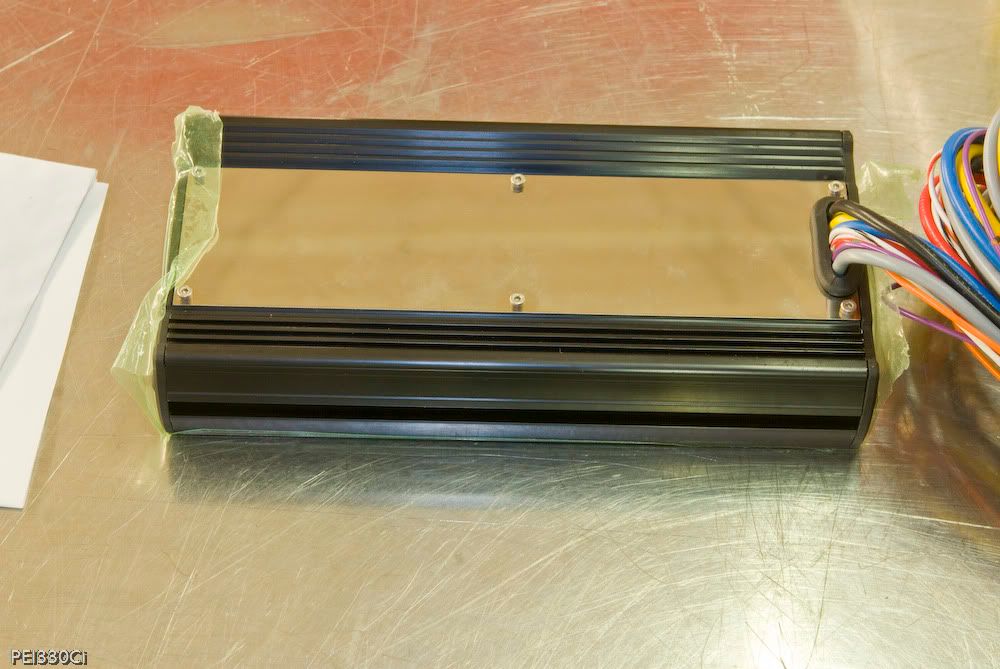
Speaking of the Max Extreme Race controller:
There are too many features to list here....let's just say it's "Loaded".
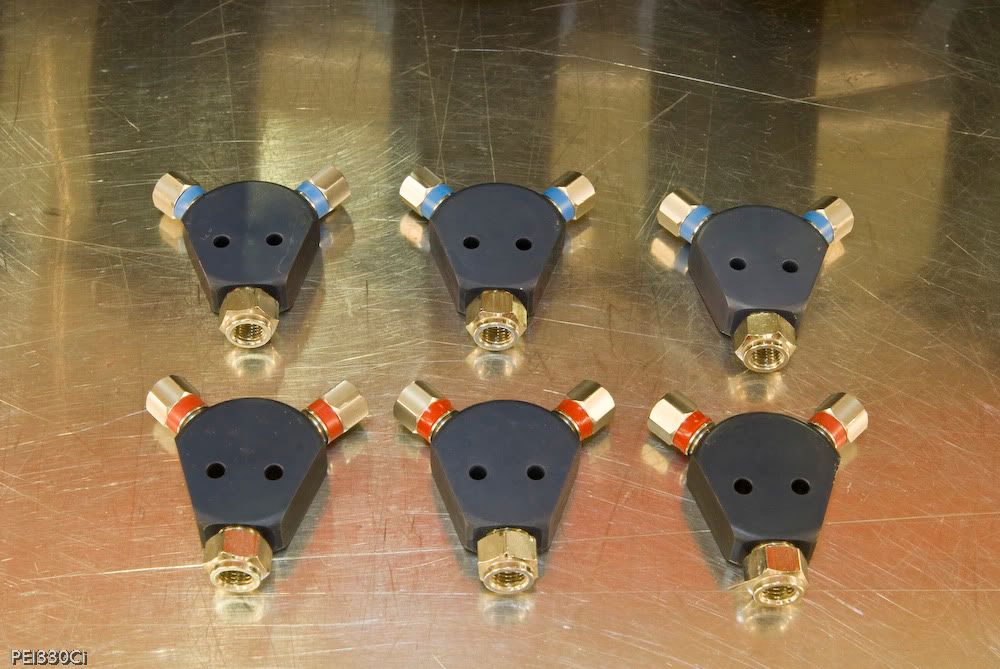
Nitrous and Fuel distribution "Y" Blocks:
These pieces have super clean machine work, and have a black satin finish. I will be using 2 different sized distribution lines, and the "Y" Blocks supplied have different internal volumes and oriface sizes to maximize flow efficiency.
This is a "Y" block to join nitrous lines from 2 nitrous bottles:
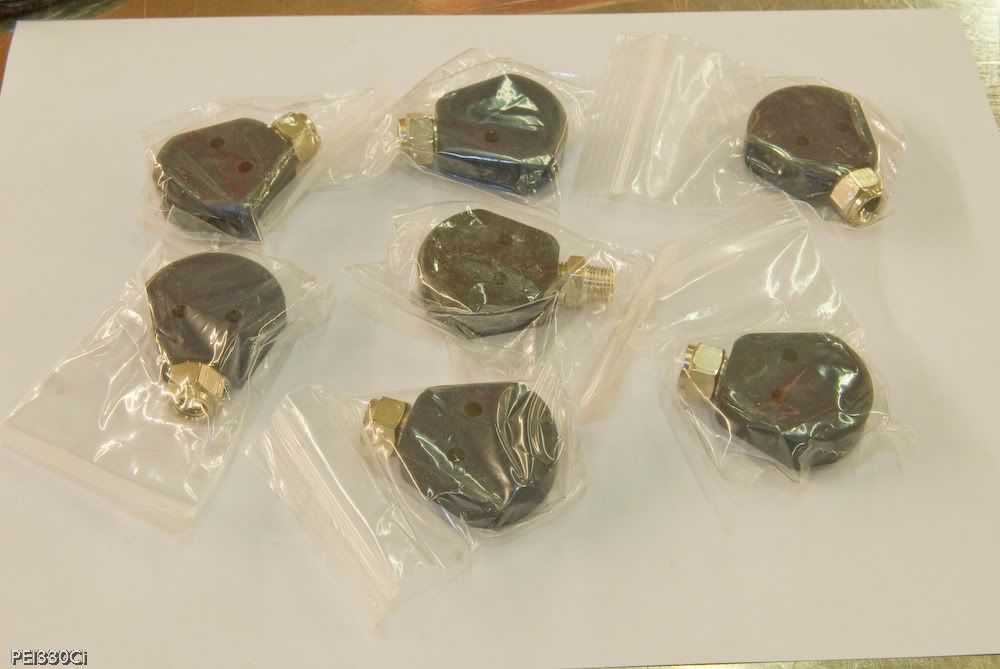
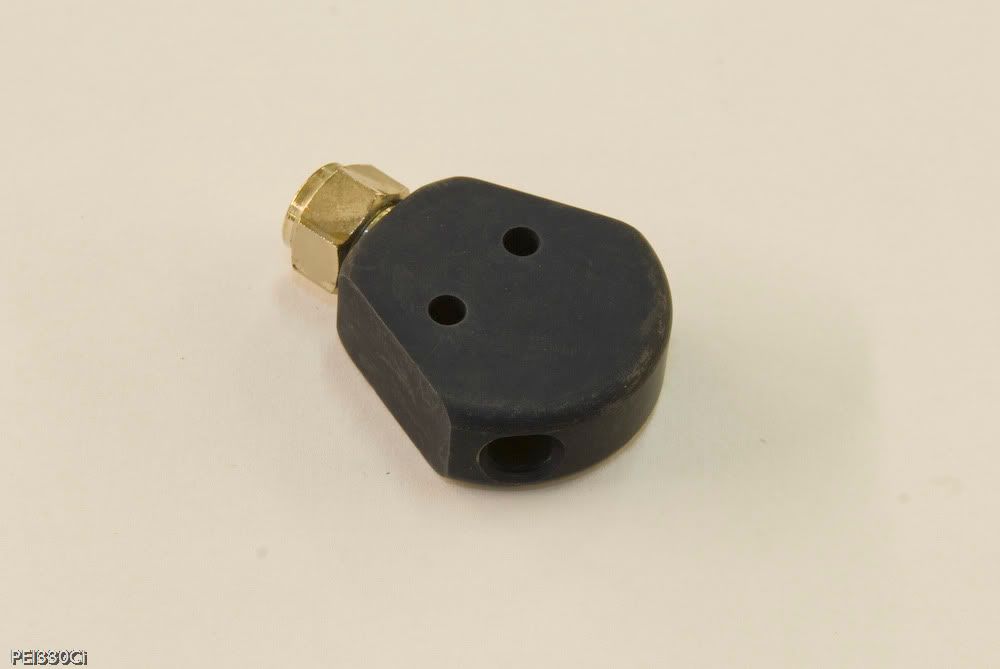
6 "Pulsoids", and a TON of fittings to build the system:
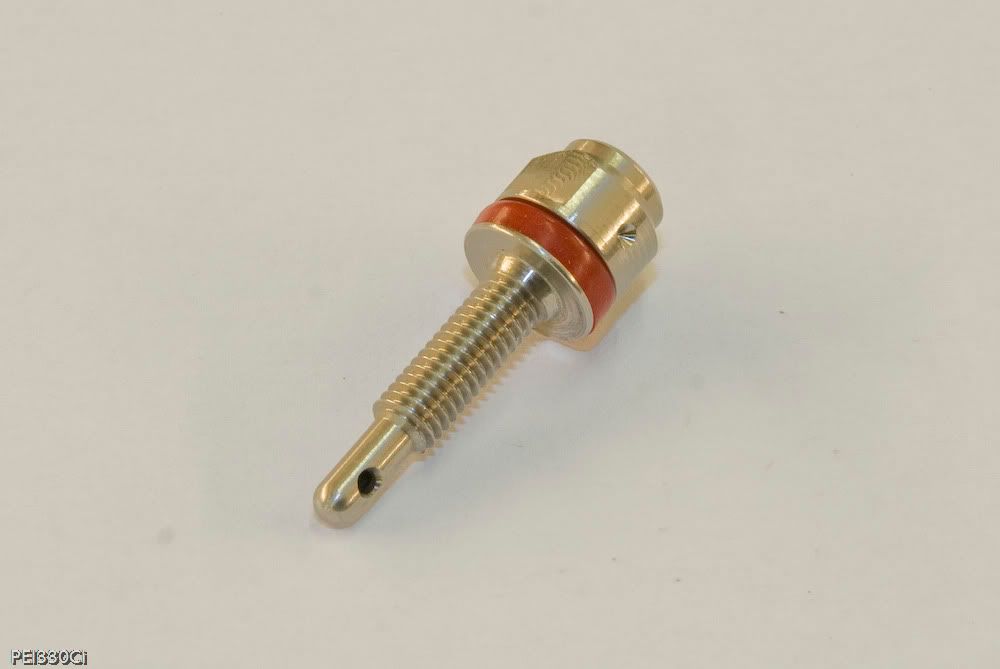
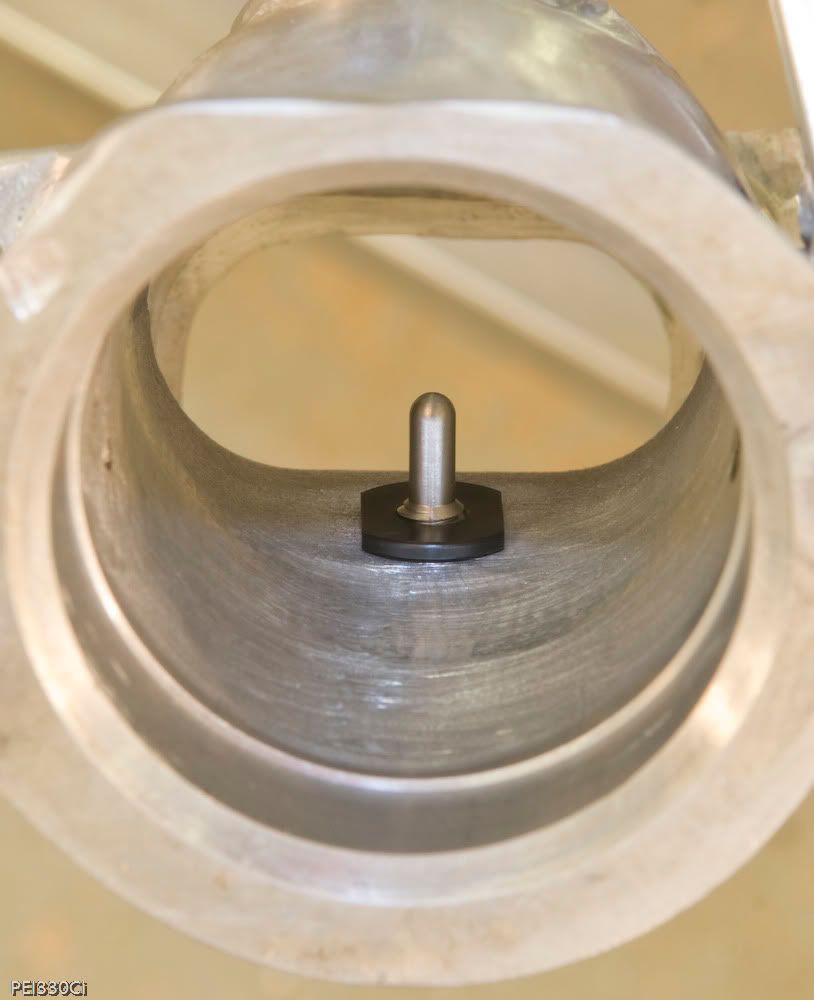
Venom Fuel injector:
It is machined from stainless steel, and comes with installation hardware not pictured. You can mount this piece in anything from an aluminum runner to a rubber intake boot.
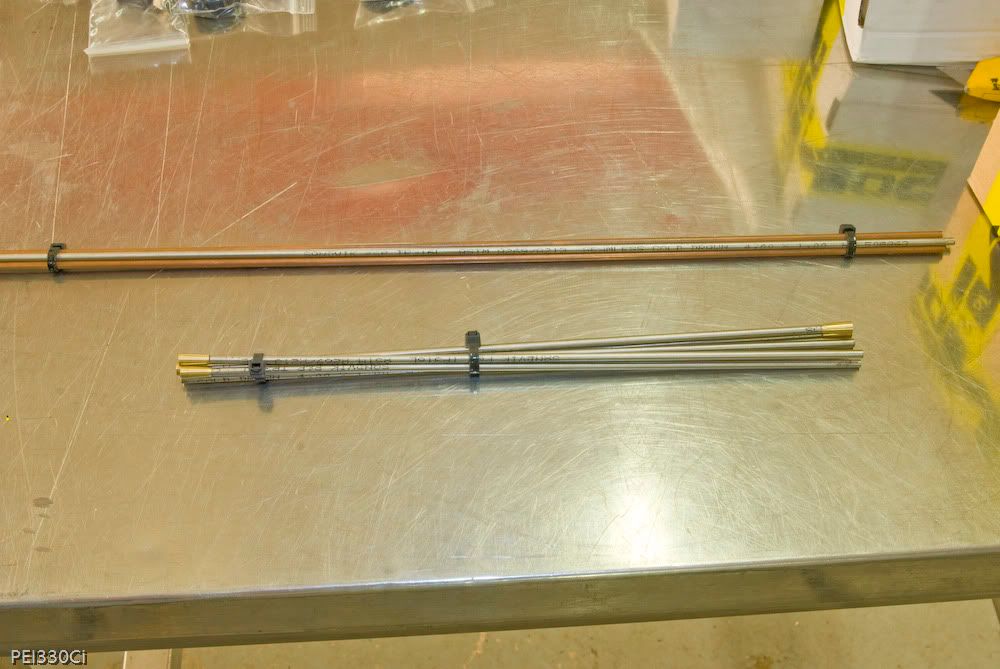
Nitrous discharge tubes in the foreground, and distribution tubing in the background:
Once I start the installation of components, the system architecture will be explained in more detail. There are a number of different products and very innovative features not pictured yet.
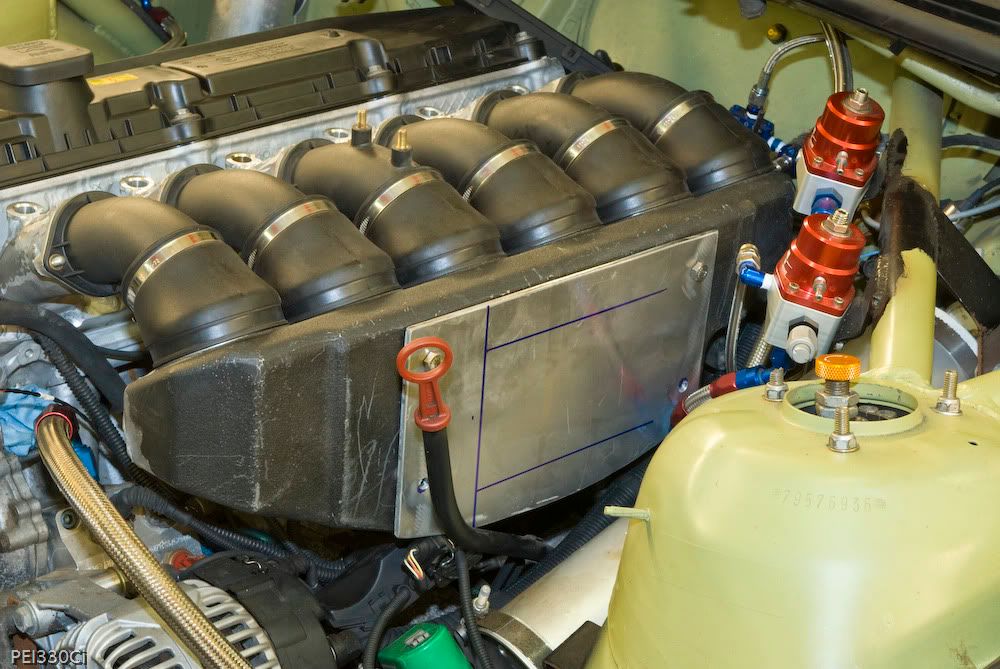
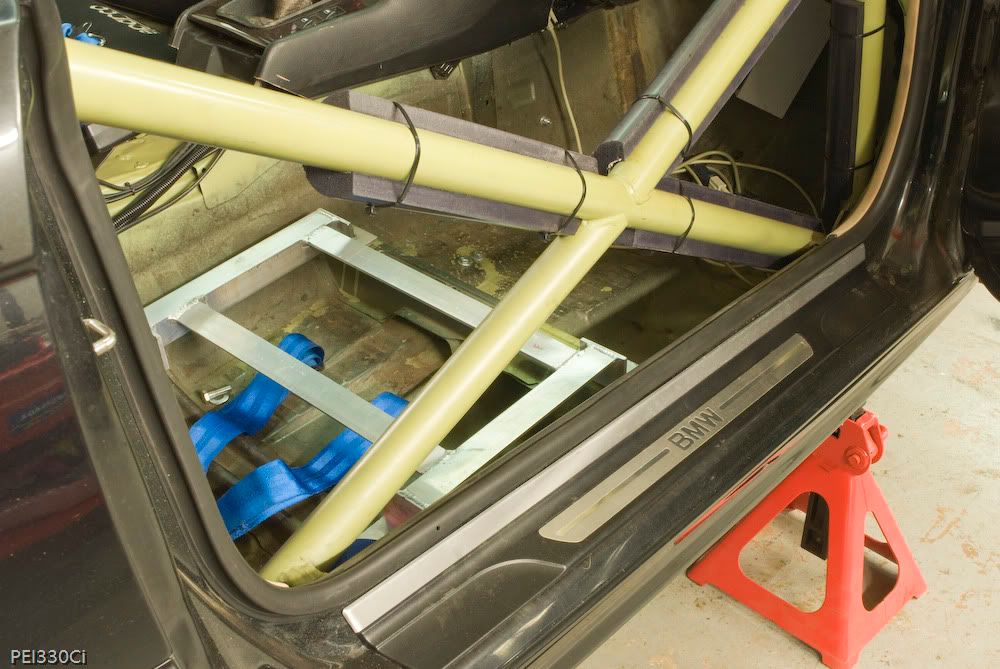
Here's the future home of the system:
Yes...it's still under construction at the moment.


PEI330Ci wrote:With all the work going on with the new intake manifold, I haven't had much time to work with the nitrous system yet. But....I have been able to get started.
Venom fuel nozzle installed:
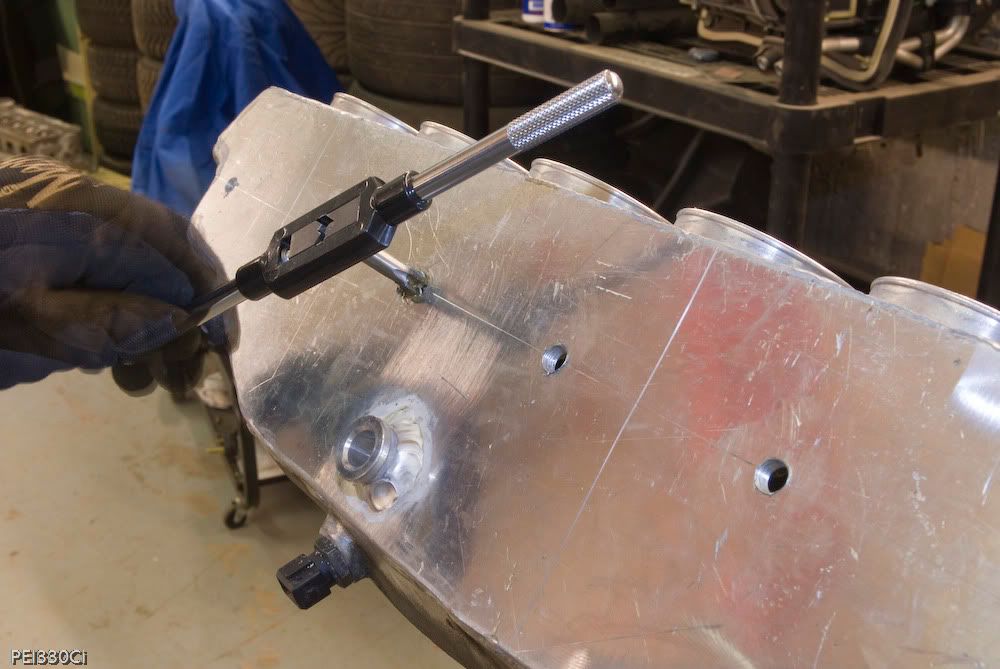
Trimming installation fittings to perfectly fit the manifold:
Finished fuel nozzle installation:
Preparing intake plenum for nitrous discharge tube bulkhead fittings:
Ready for installation:
Trial fitment of complete manifold assembly:


PEI330Ci wrote:Thanks guys.
After consulting with the "Wizard", I decided to move the fuel nozzles to the top of the intake runners. This meant grinding out "pads" for the nozzles to sit properly on top, and welding in the old holes on the bottom. More on this later.
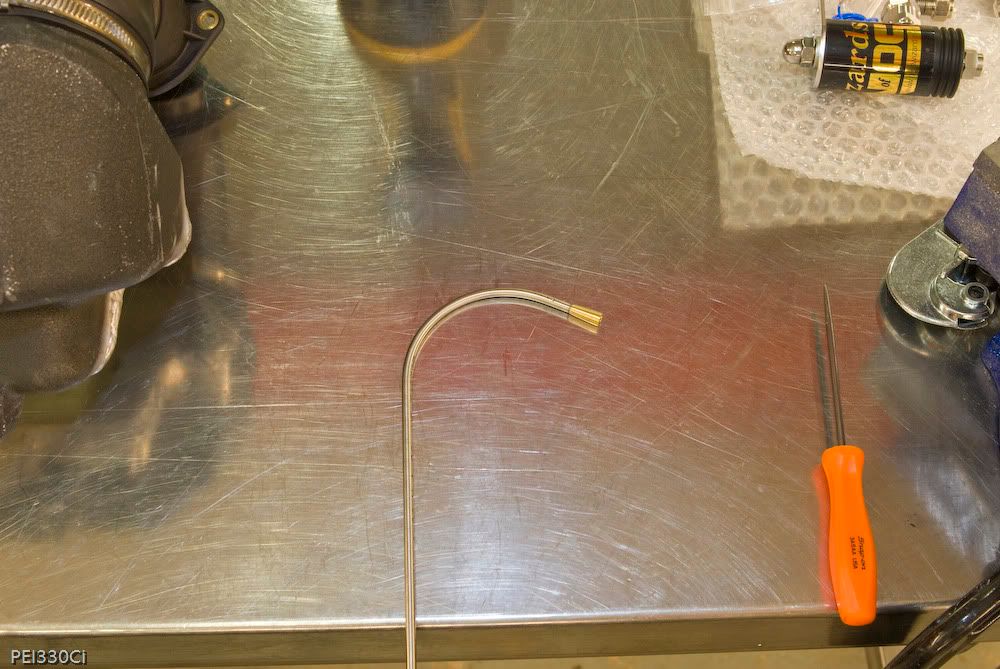
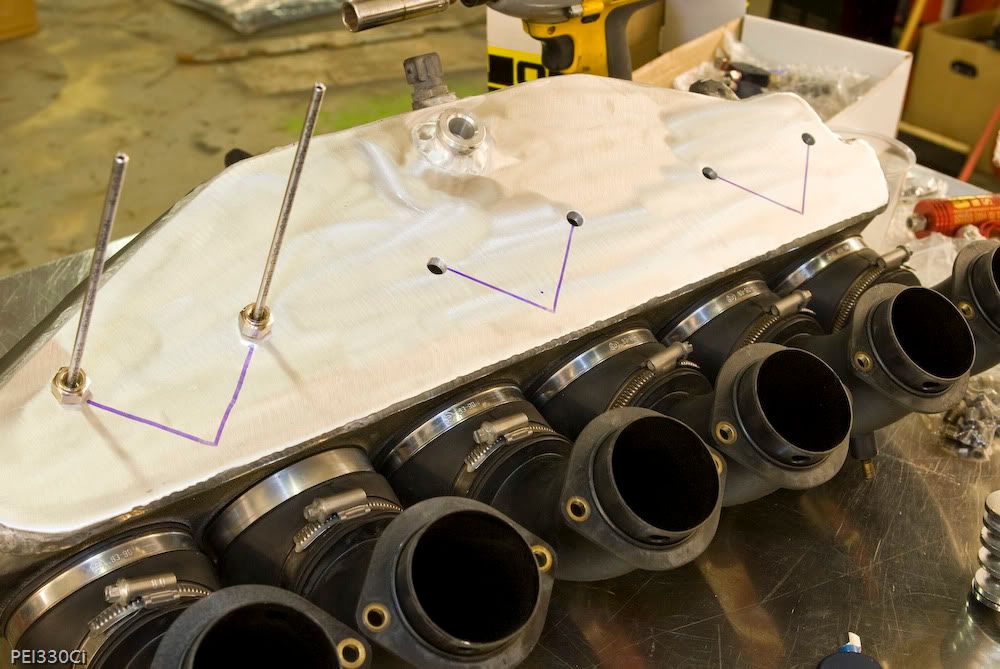
While the the lower part of the intake was out for welding, I started working on the nitrous discharge tube installation on the plenum. Here's one of the bending templates:
Hey, it worked well.
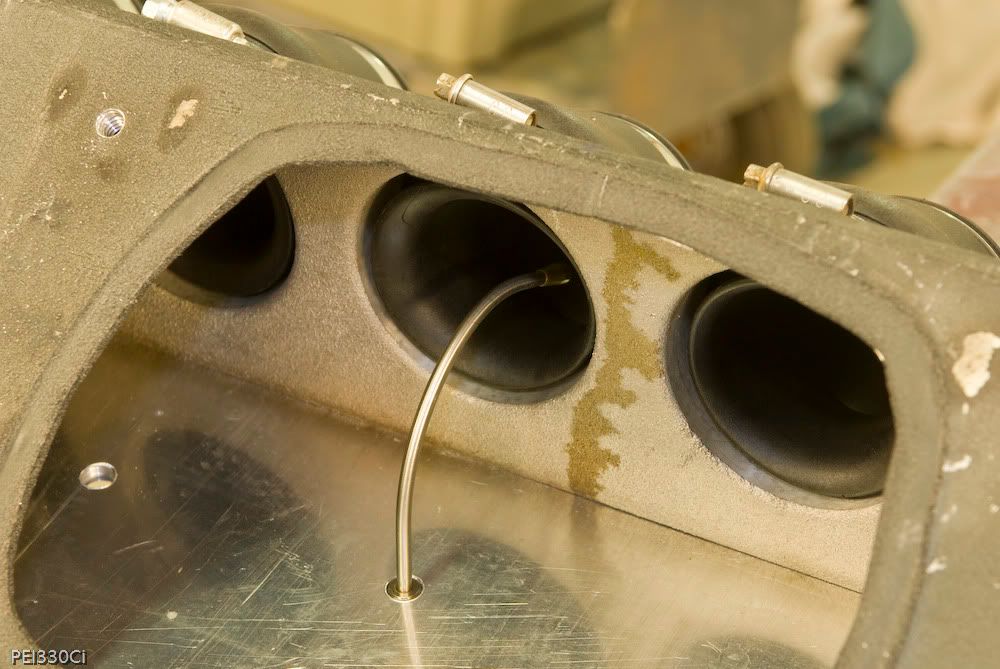
The result:
Test fit:
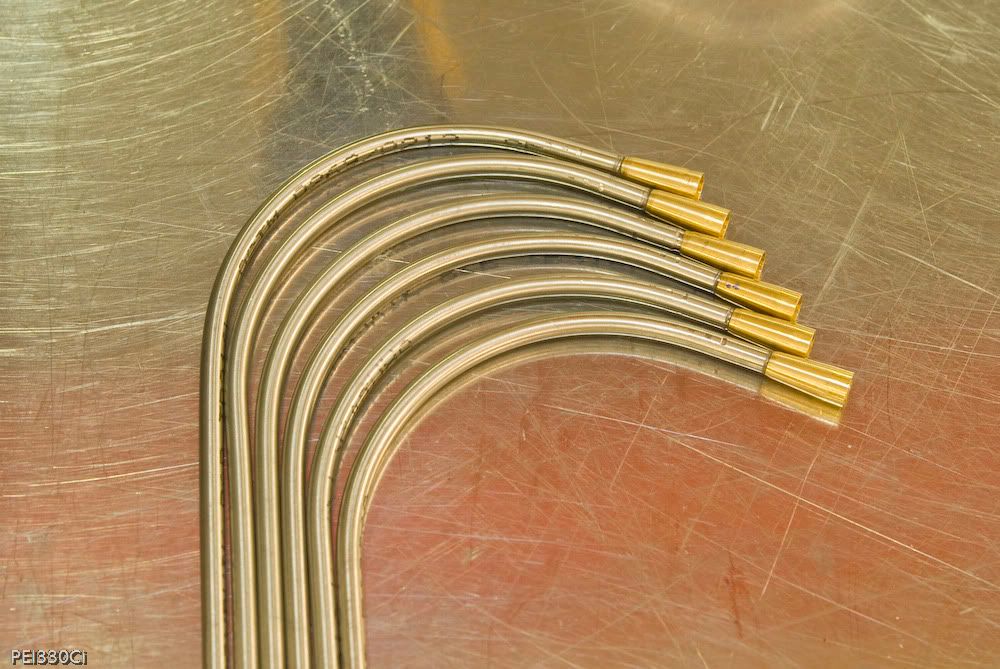
All 6 ready for the next stage of fitment:
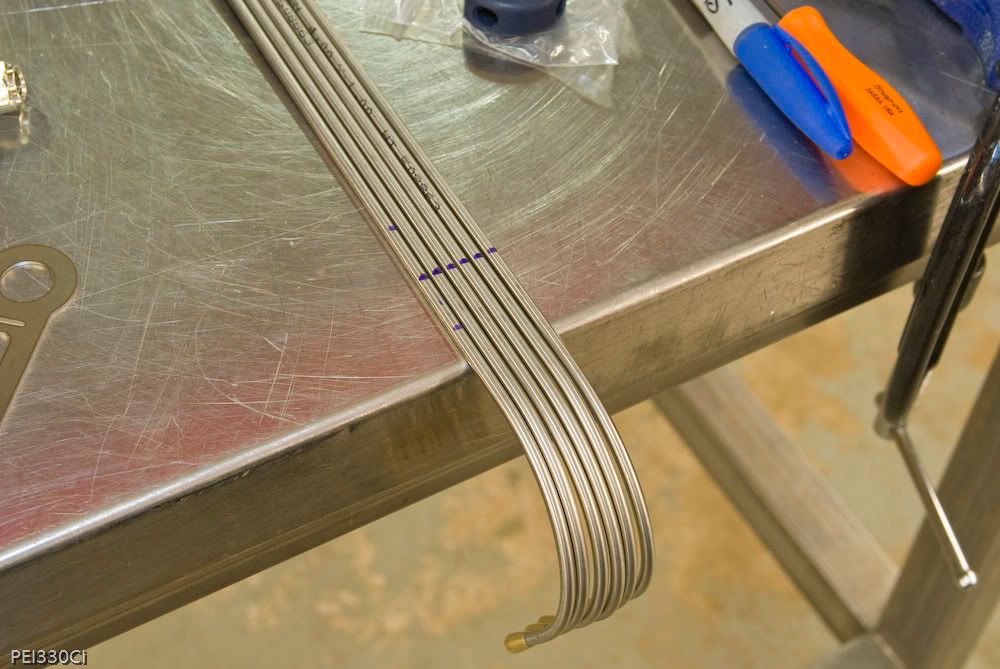
The tube on the left with 3 marks on it was the test piece to find the optimum height of the discharge tube. The top and bottom marks represent where the end of the tube contacts the top or bottom of the runner, the center is our target height. This was then transferred to the other 5 discharge tubes:
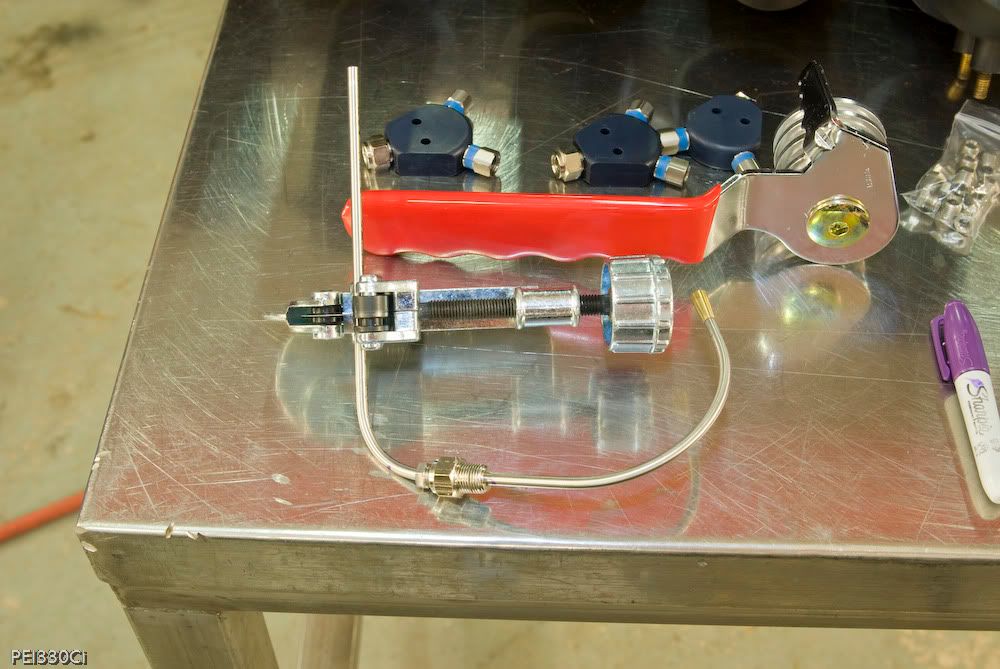
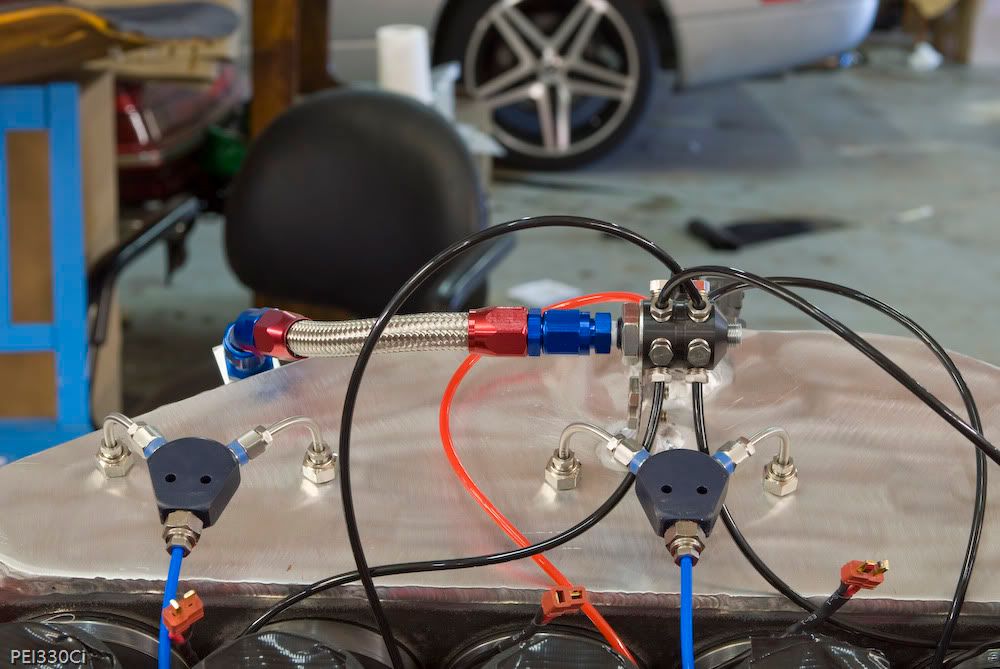
Fuel and Nitrous "Y" Blocks assembled with fittings:
Here I've used a square to mark the intended path of the tubing prior to bending:
Cutting a discharge tube to length after bending is complete:
Finished result with bulkhead fitting installed:
Installed Nitrous discharge tubes connected to a "Y" block:
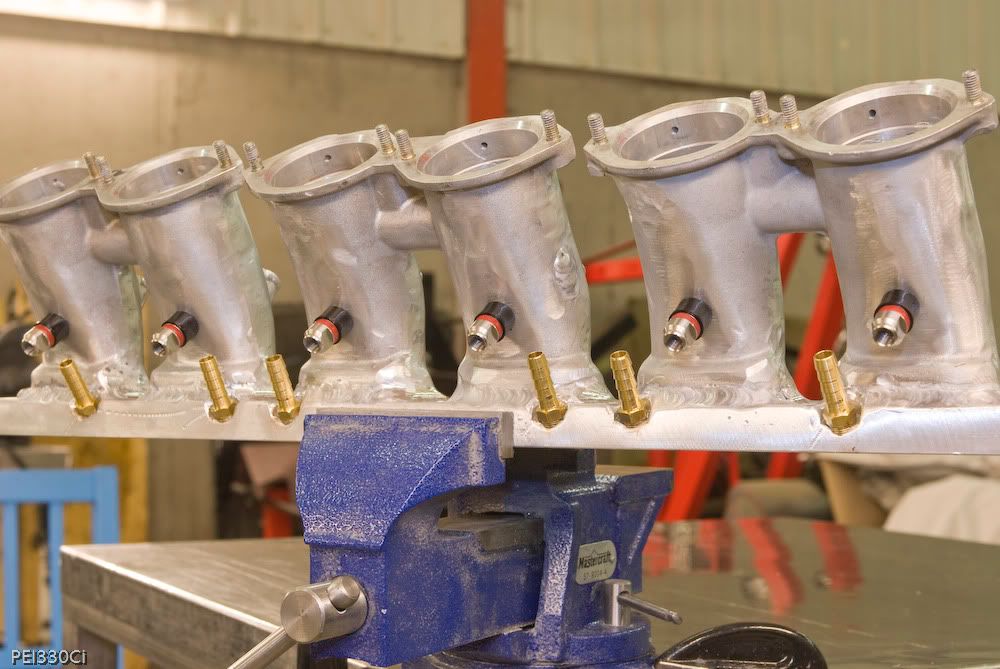
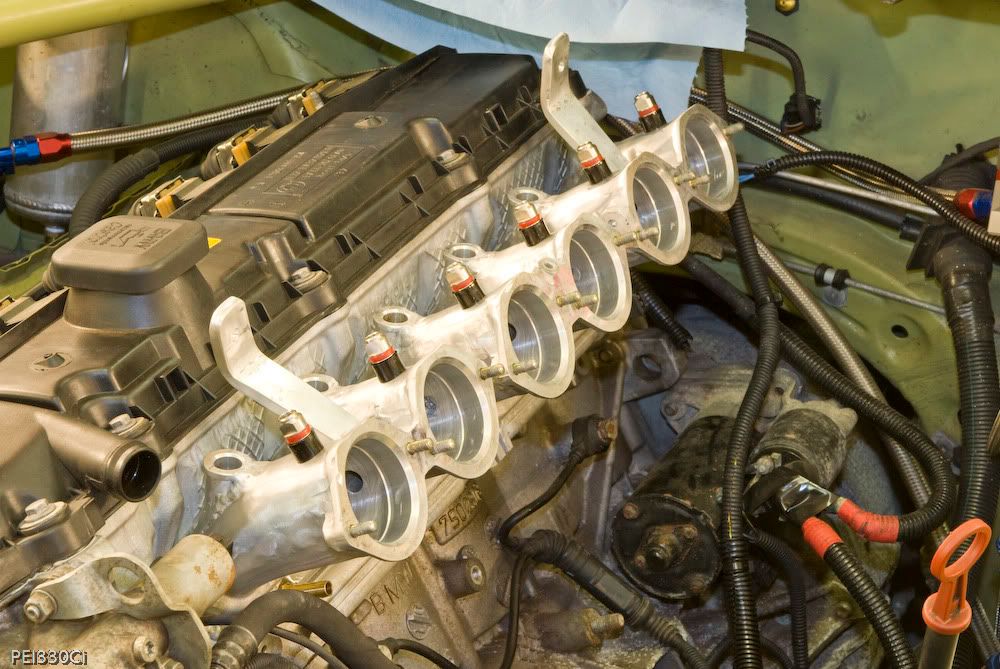
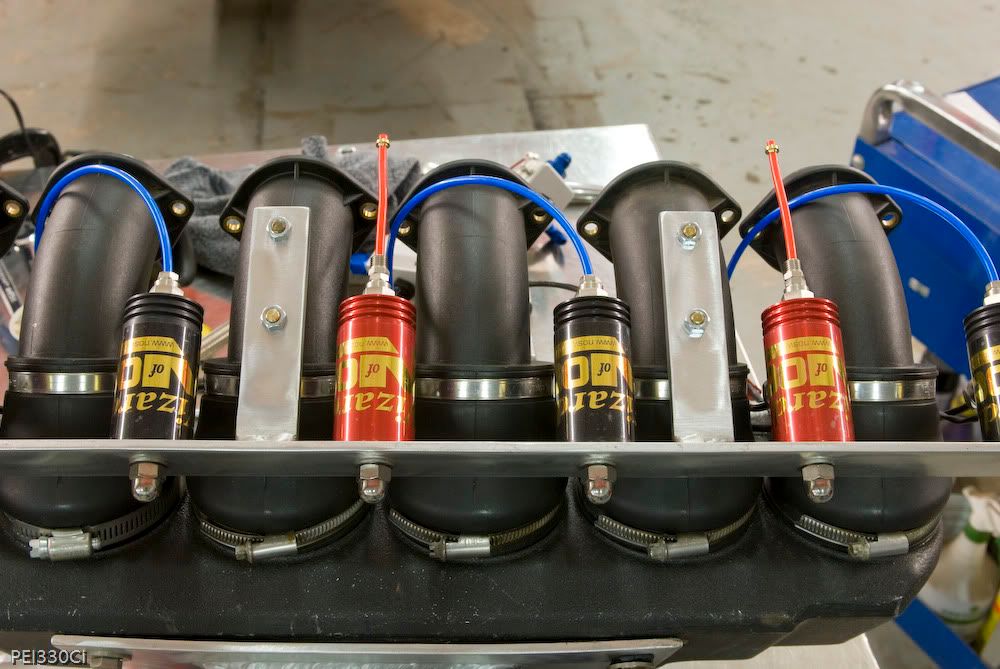
Venom fuel injection nozzles installed on the top of the runners:
To make everything fit, the fuel injector wiring harness had to be modified and moved:
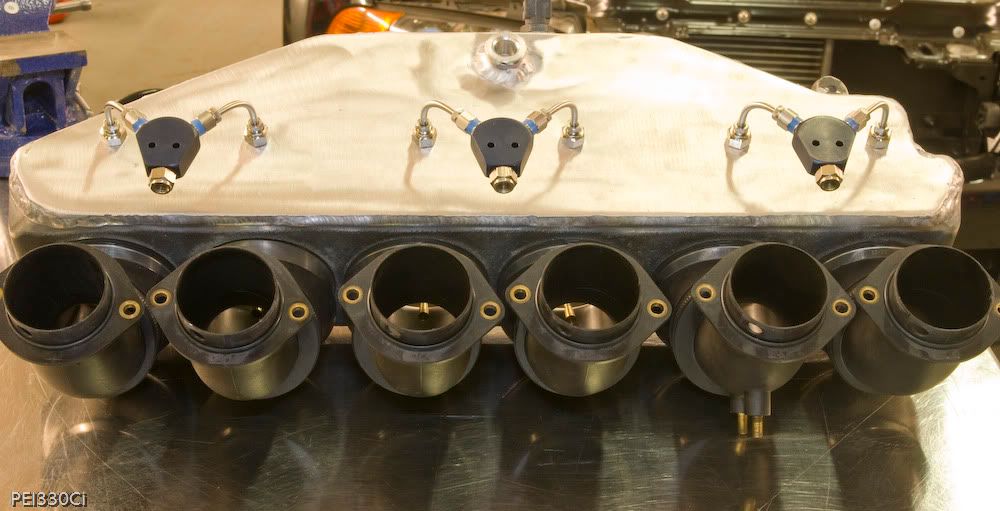
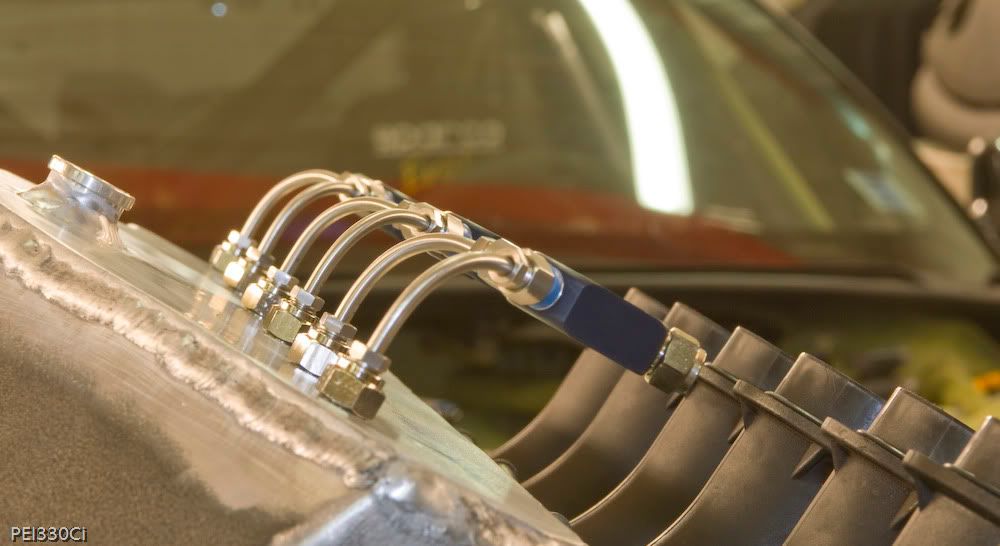
Finished Nitrous discharge tube installation:
A lot of time was spent making sure everything lined up:
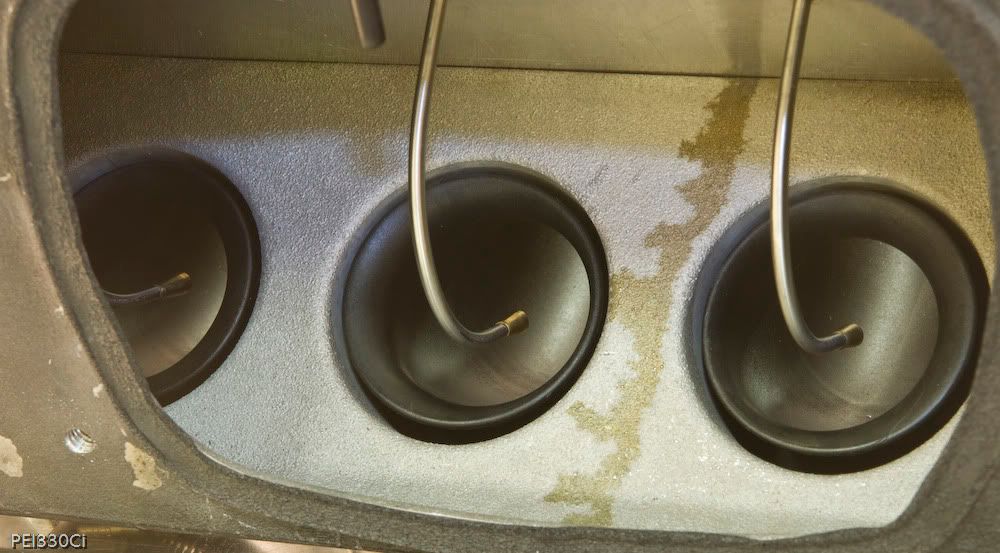
Pro Series Nitrous discharge nozzles in the runners:
This gives an overall view of the nitrous flow path:


PEI330Ci wrote:Thanks.
The design is a credit to Trev at Wizards of Nos.
Beautiful components deserve a beautiful installation...just trying to carry on the theme.
:lol We don't talk about $$ here, it scares people. (Like me!)
Thanks for the kind words.
Thank you, I've recieved a lot of good advice from the team at WON.
I might have to drop the car out of a plane to hit it, but some where....some day....I'm going to get my #. :buttrock
Thanks
PEI330Ci wrote:Good eye Brian. I busted my TB clamp a while ago, and replaced it with the one you see pictured. When I was re-assembling the manifold I mixed them up.
Ok, not a lot of updates, but I have been extremely busy.
Aside from spending last Sat/Sun at the drag strip flogging the car in N/A trim, the car has been under the knife.
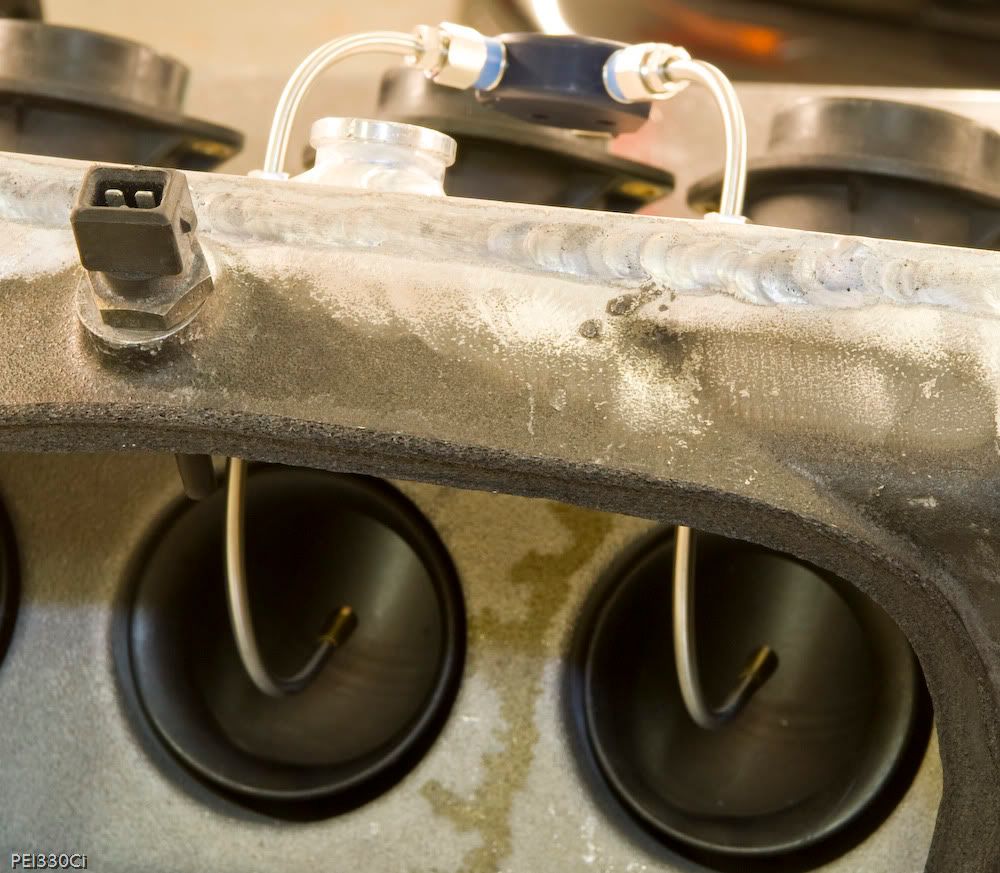
Last week I relocated the IACV:
Wiring the Pulsoids up with quick disconnects:
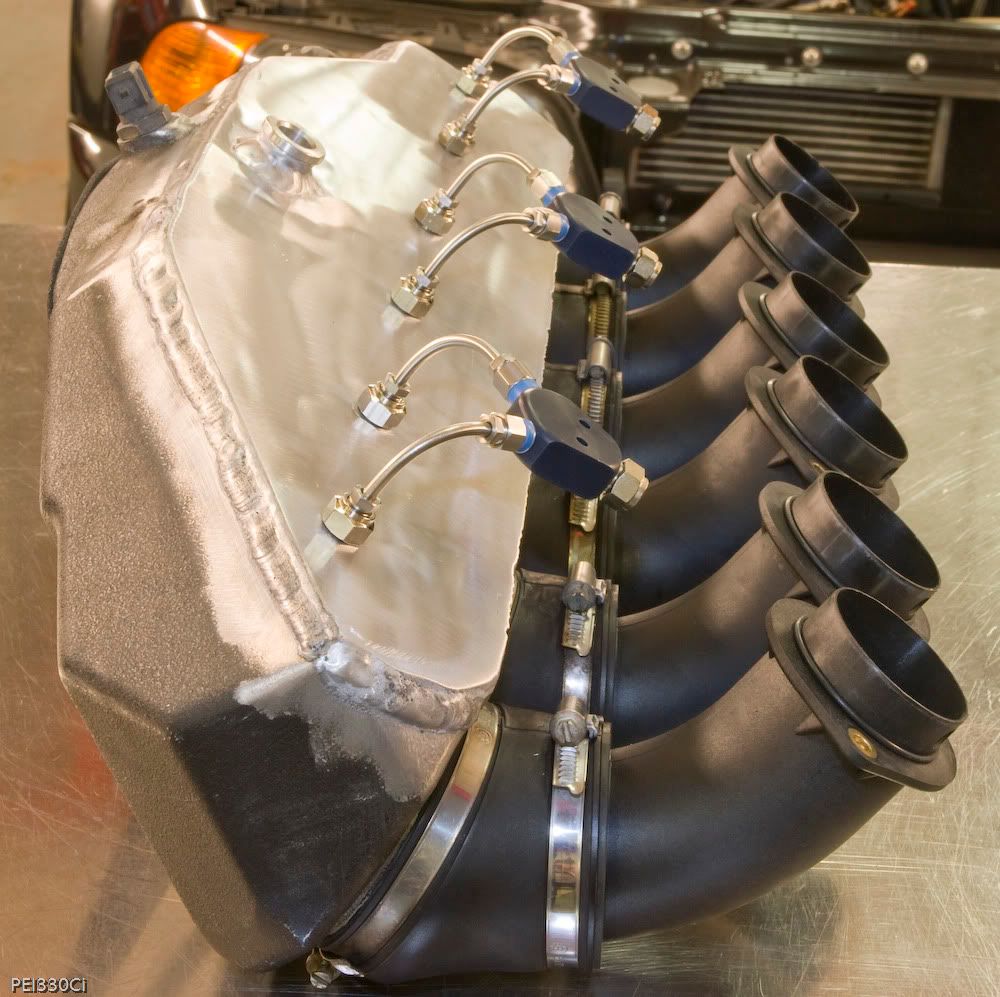
And here's the plenum with the Pulsoids plumbed ready for the wiring harness:
Both of the fuel pressure regulator mounting points needed to be relocated:
First FPR mount welded back on in it's new position:
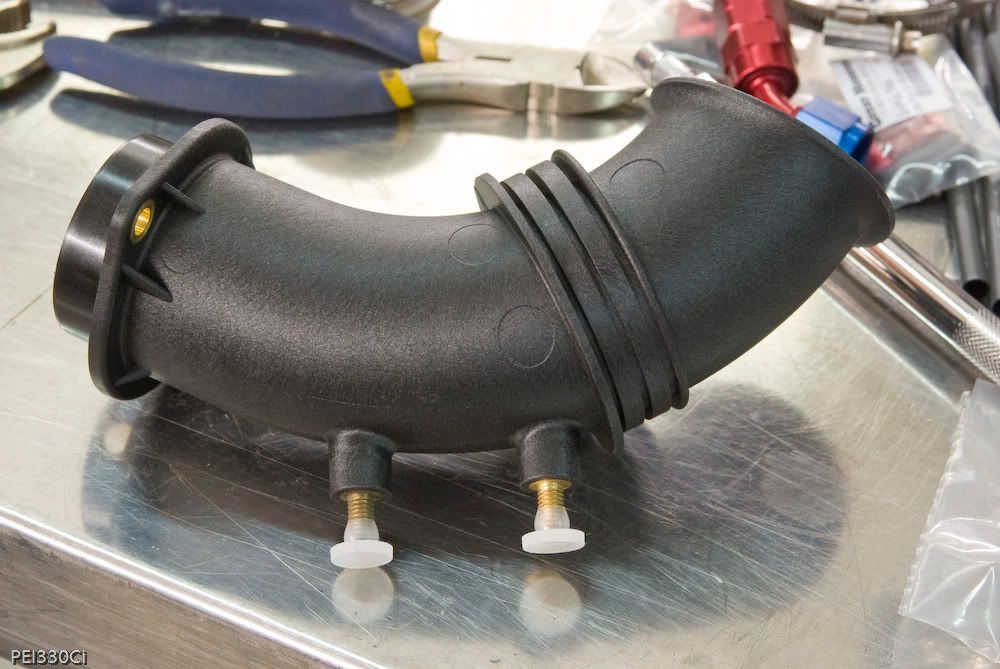
New cylinder #5 runner direct from Germany:
And here's what it was for:
It's a mounting point for the Pulsoid rail.
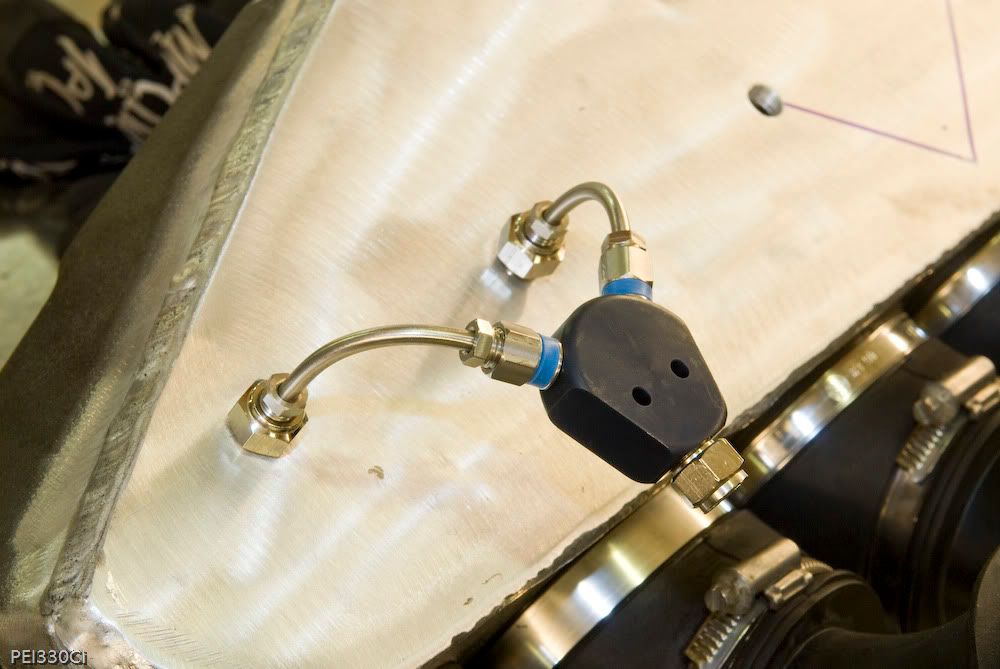
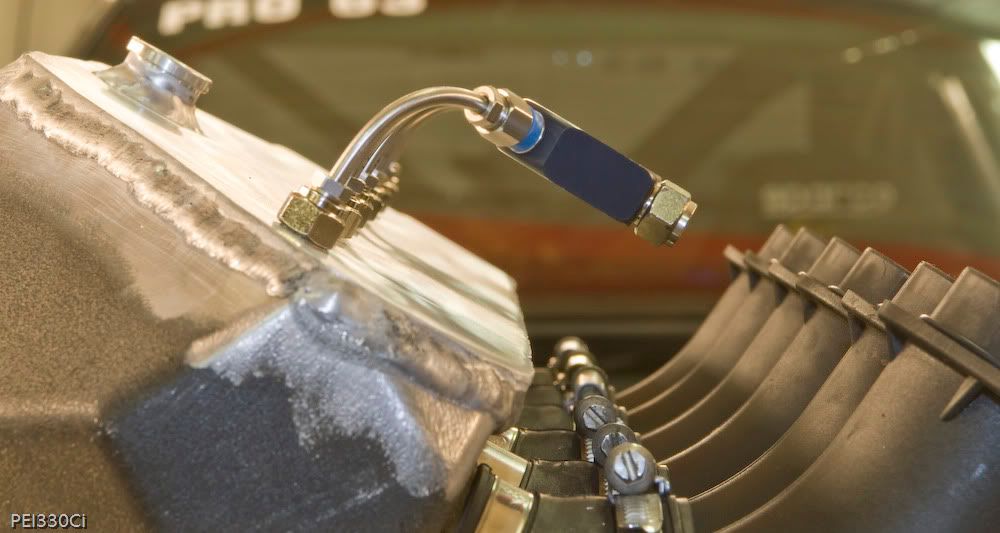
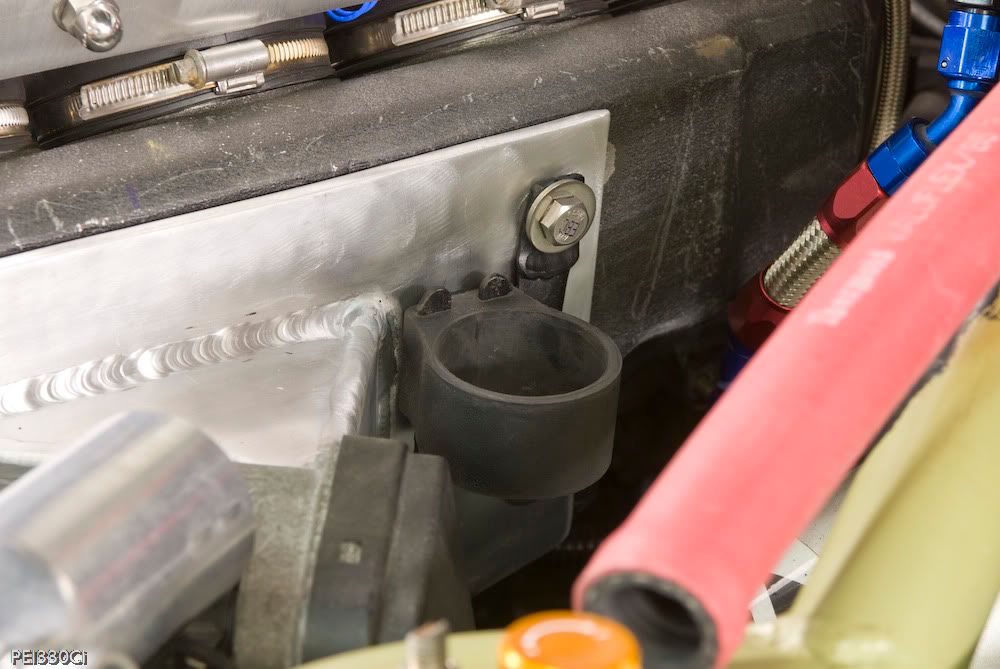
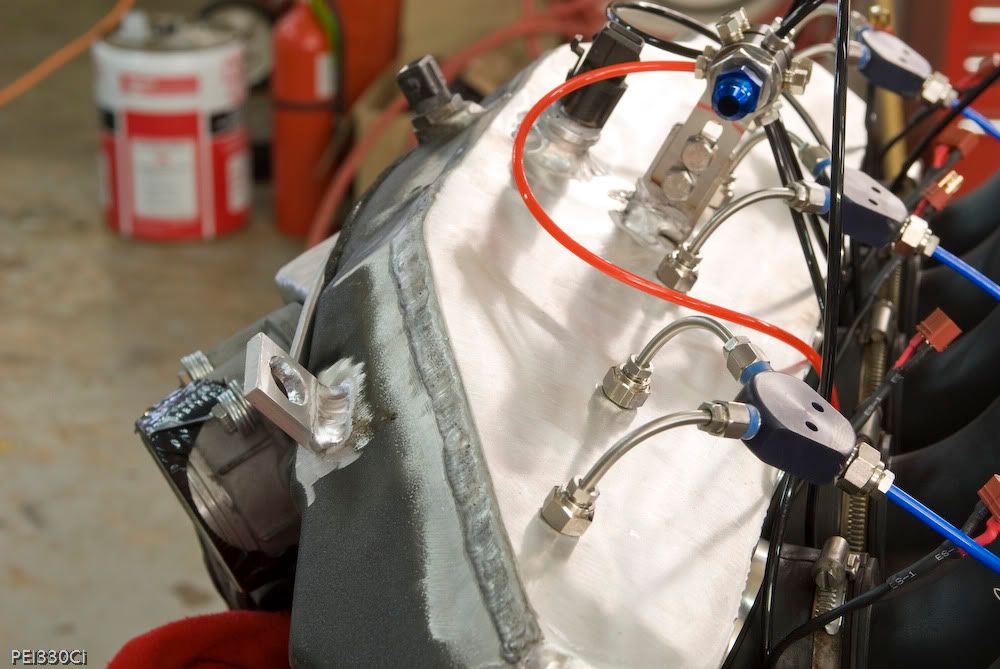
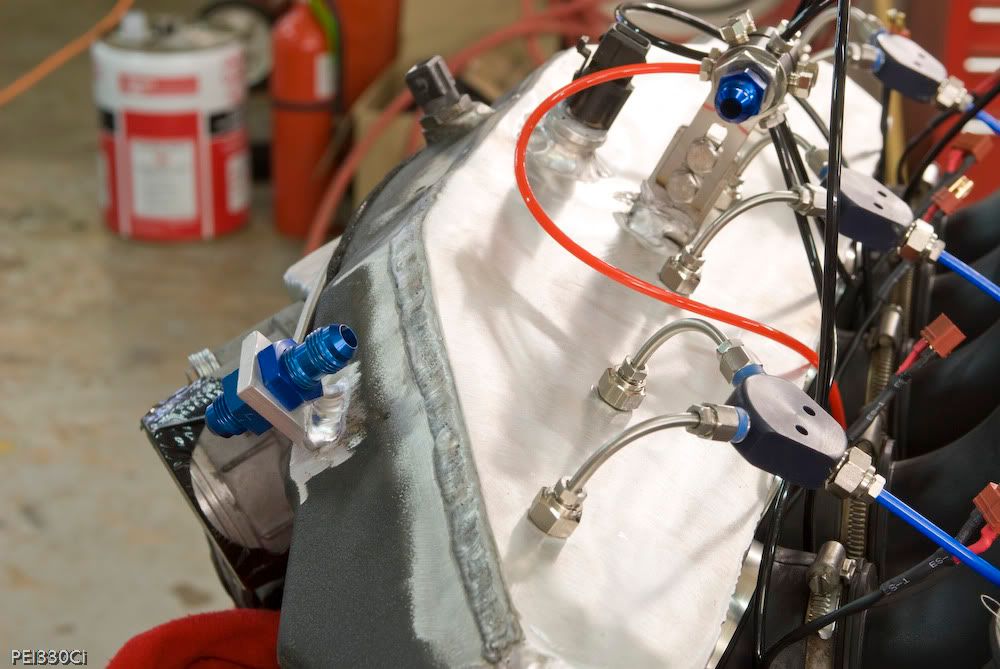
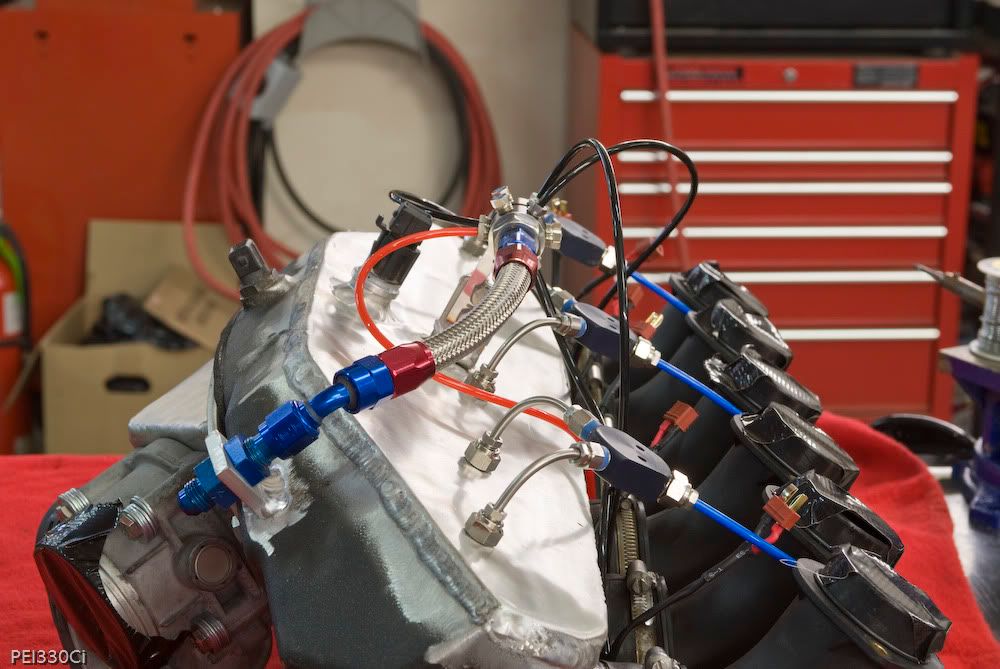
The layout of the system, and the intake manifold in general, was designed to make working on the engine easy. With this in mind, the connection from the fuel pressure regulator to the nitrous system distribution block was proving to be a bit difficult. The solution? Mount a bulkhead fitting in an easy to access location:
Fuel line routed to the distribution block:
In a funny coincidence, the bulkhead fitting location allows me to re-use the old FPR to Nitrous system fuel line.
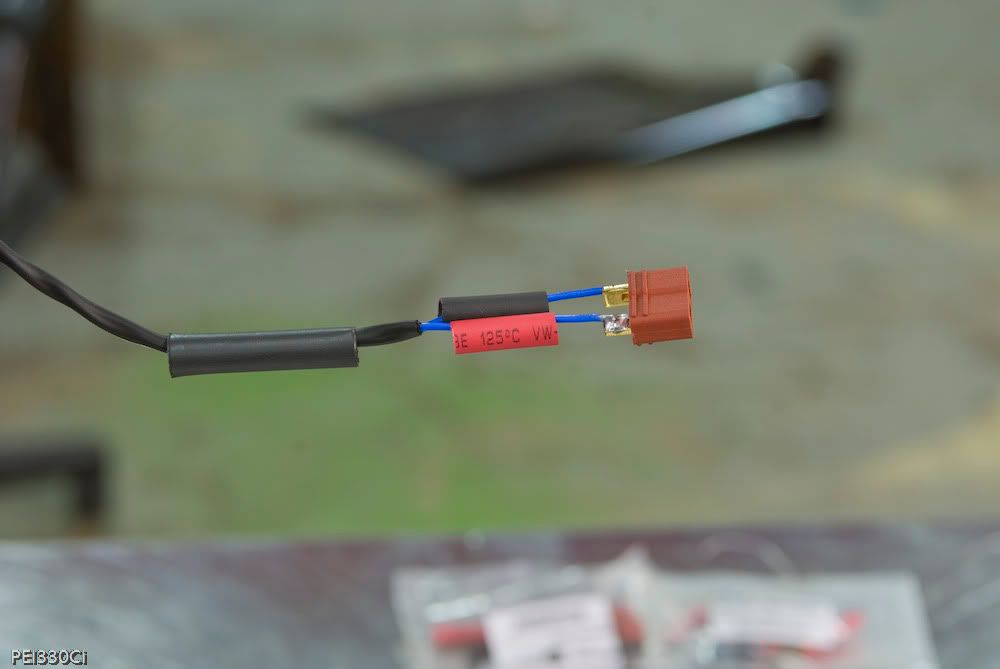
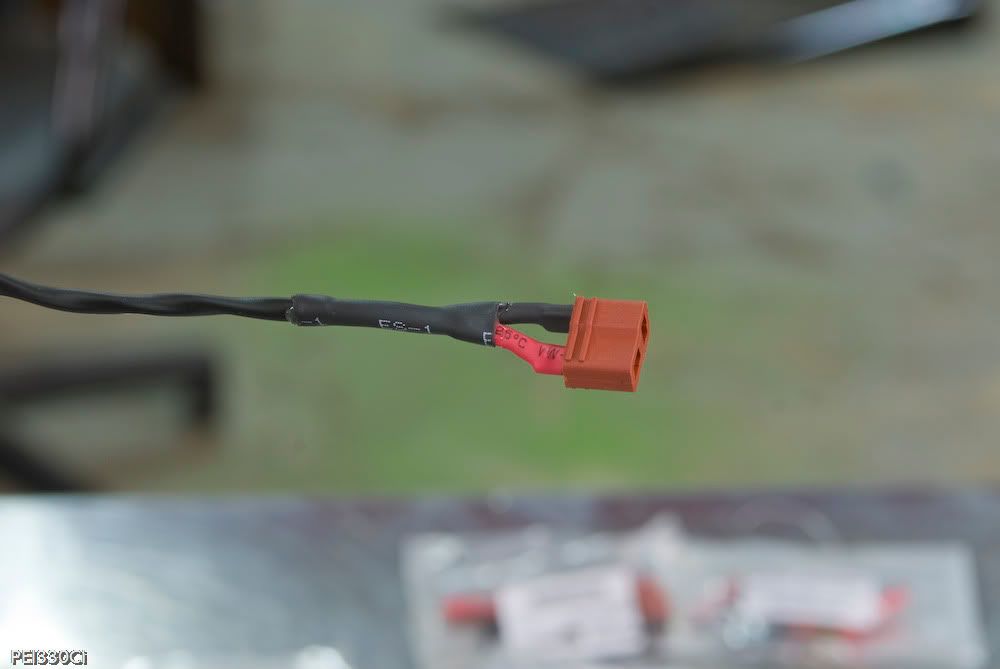
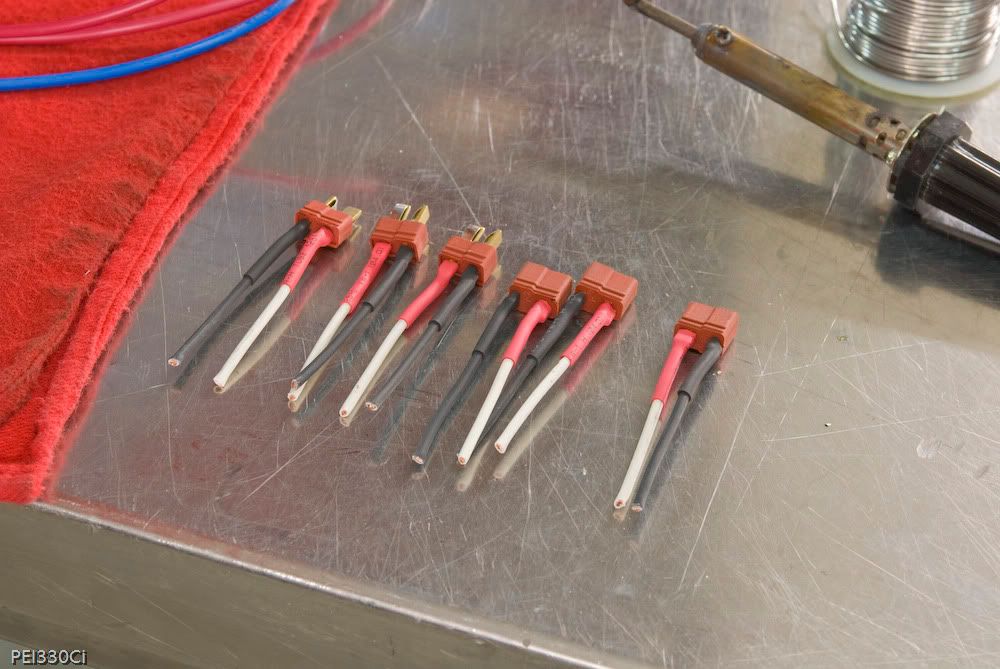
With most of the plumbing sorted, I started working on the Pulsoid harness. These are "flying leads" that will connect to the pulsoids from the harness:
Note that I've used a different connector orientation for the fuel and nitrous Pulsoids so that they don't get connected improperly.
And that's it for now. I've also been working on a new bottle mount bracket for the passenger seat area, (Aluminum) and wiring in the Nitrous controller. (Lots of wires...)

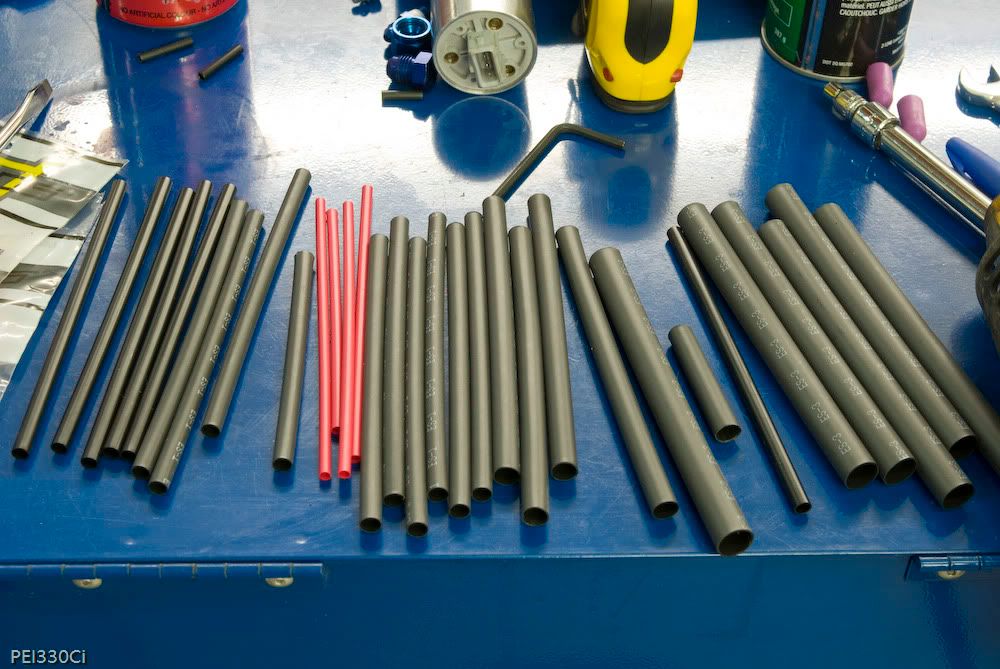
PEI330Ci wrote:Work on the Pulsoid wiring harness continued today. Here's about half of the heat shrink I purchased to complete the harnesses:
This gives an idea of the layers of heat shrink with glue applied to protect the wiring:
The nitrous and fuel harnesses were built as separate pieces to allow easier service of the assemblies. As the system power is changed, the pulsoids will be "tuned" for the application requiring removal and testing. These harnesses will allow all the fuel and nitrous pulsoids to be tested in a test rig with ease.
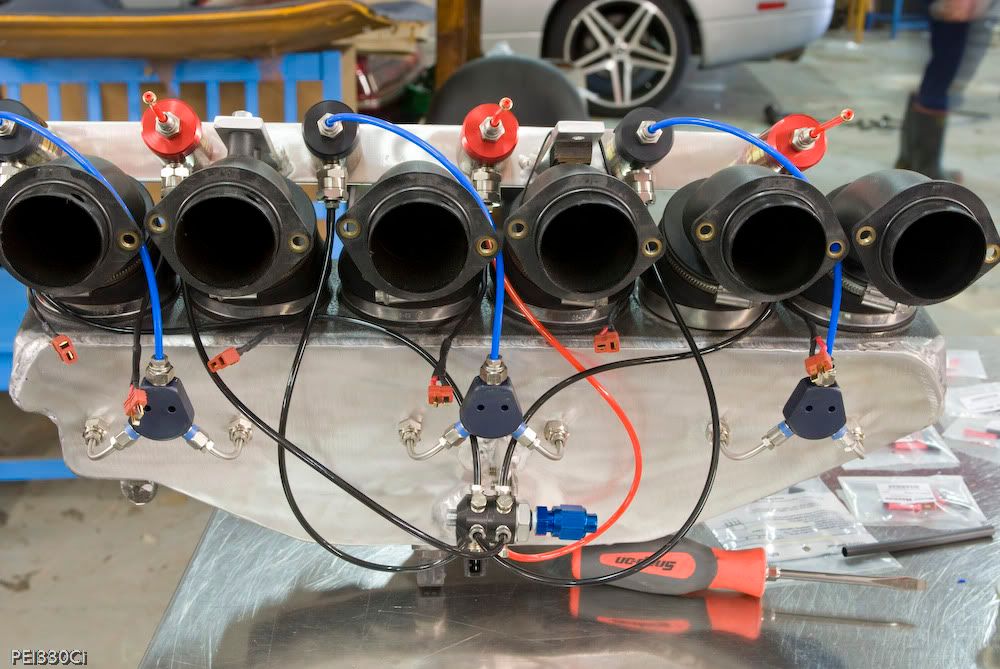
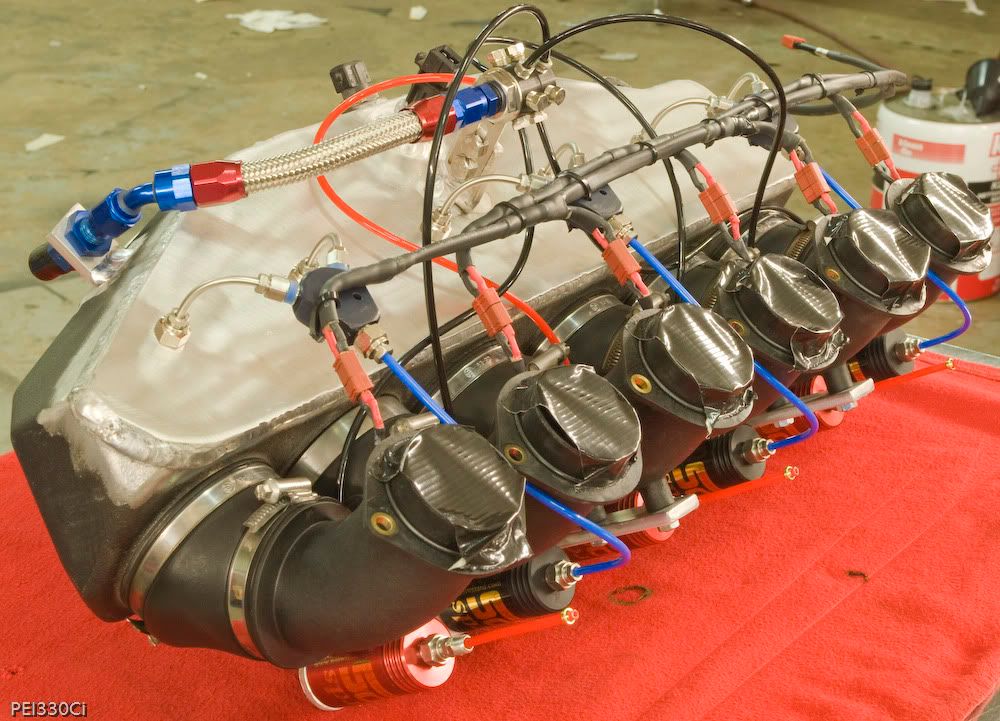
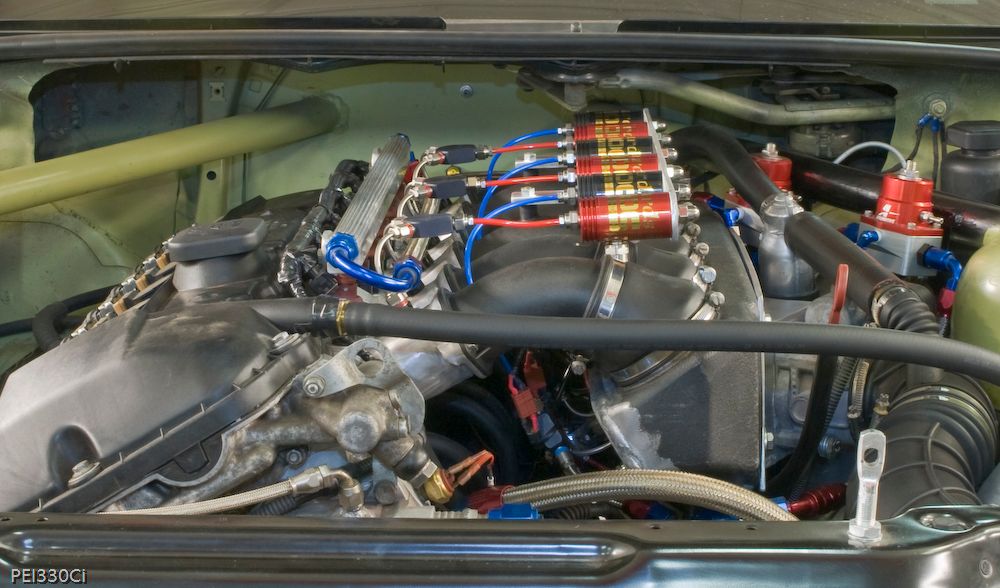
The finished harnesses on the plenum:
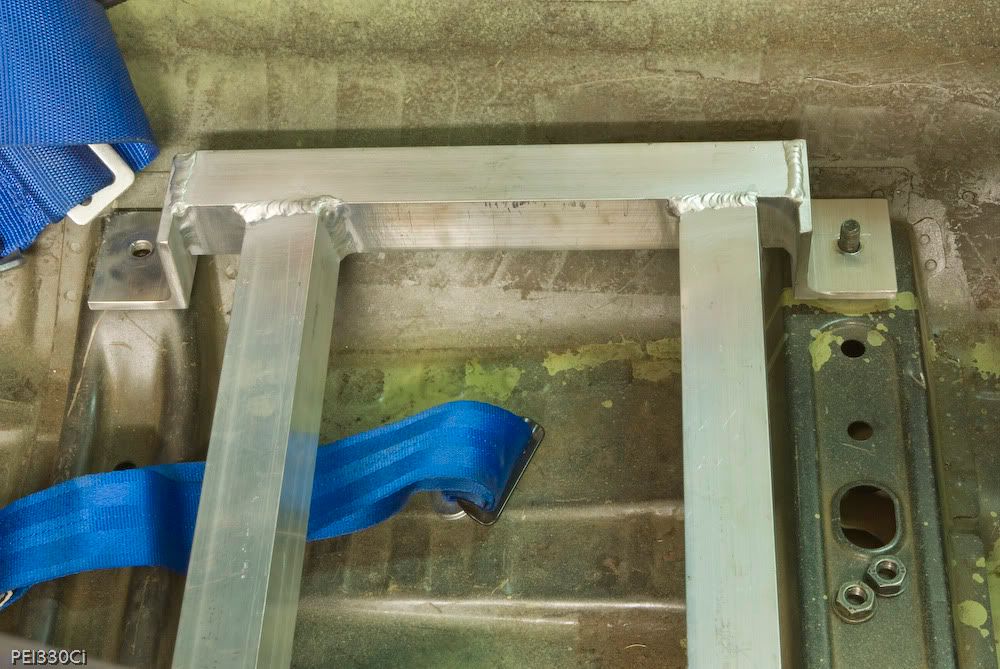
It was a 3 step fabrication process to get everything perfect, but the nitrous bottle mounting plate turned out great:
That's it for today.


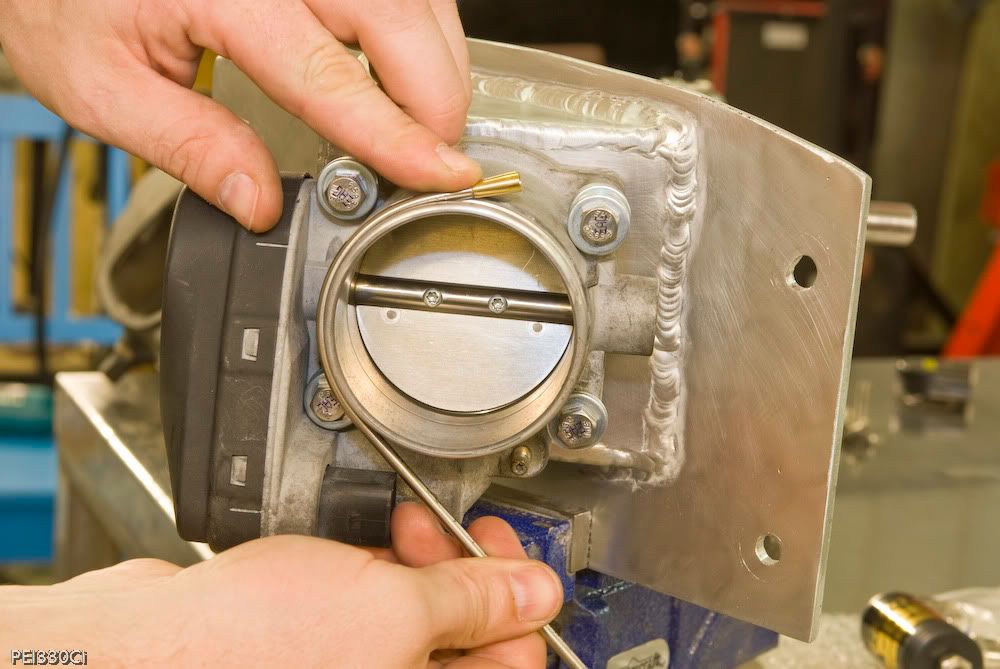
PEI330Ci wrote:I used a brake line bending tool for the small radius bends, that's as tight as I would probably want to go with this size SS line. (1" bend radius) For larger radius bends, you'll need to make or find your own tool. The Throttle Body just happened to be very close to the bend radius that I needed, so I used it. An alternative is to trace and cut the bends out of a flat piece of hardwood.
Thanks.
Think of all the line between the bottle and the nitrous discharge nozzle (or tube in this case) as a giant spring. The longer the line, the softer the "spring" is. As the Pulsoids are pulsed, the pressure in the nitrous line fluctuates. The longer the nitrous line, the more the pressure "bounces" up and down as the Pulsoid is opened and closed. Minimizing the amount of volume between the bottle and the Pulsoid helps reduce these pressure fluctuations that affect nitrous metering further downstream of the Pulsoids. 2 other benefits are less heat soak in the line, and less flow resistance.
On my installation, each bottle will have it's own feed line to the distribution block for the Pulsoids, and line length will be under 2m.
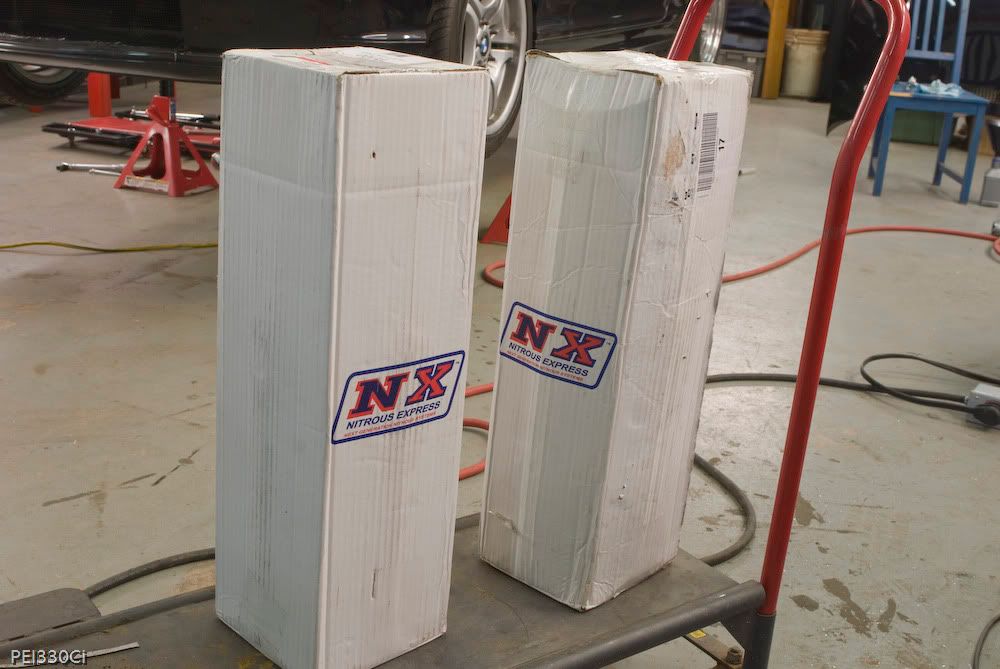
In a mix up from a supplier, an order for 1 more nitrous bottle somehow turned into 2. It was the end of a rather humorous exchange where they shipped a 4 Lb box claiming that my order was filled. I received the box and found fittings but no nitrous bottle inside. (Big surprise huh?) They then shipped another one, which was received, and the then the first one finally showed up. Being that I'll probably need even more bottles in the future, I decided to keep the lot.
The goodies:
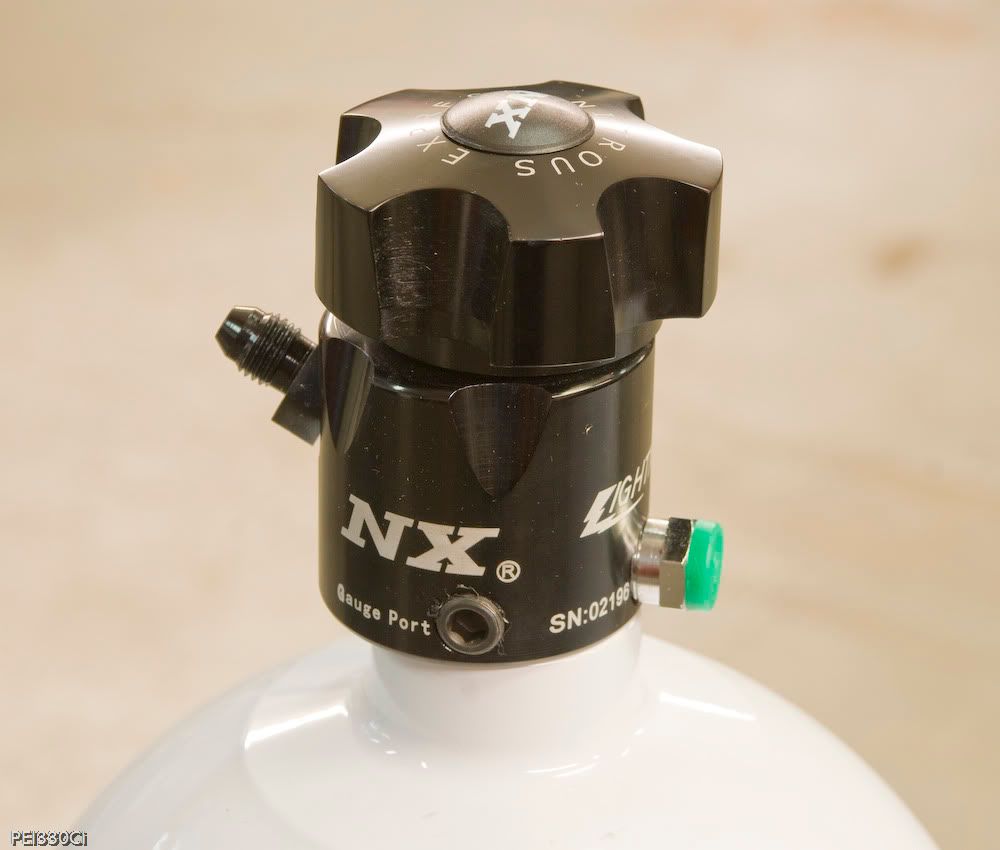
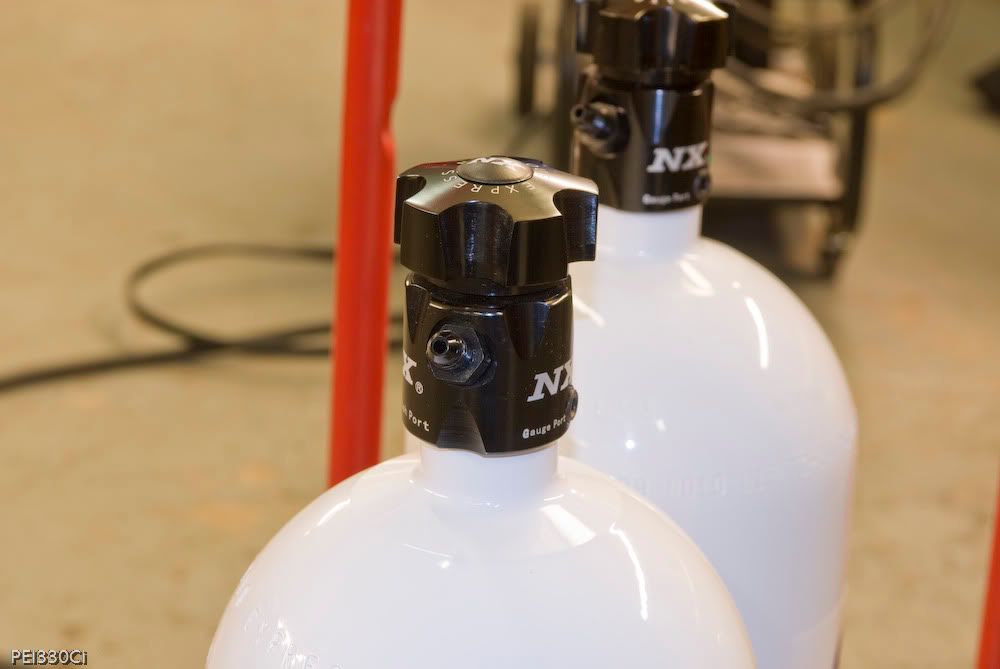
NX's "new" bottle valve that looks awfully familiar to the valves WON has been selling for many years:
No pics yet of the nitrous system installed yet, but I have been pretty busy working on bits of it.
Both FPRs had to be moved a very small amount, and luckily I was able to re-used all the fuel lines from the old setup without any trimming or cutting.
Ready for the manifold to be installed:
The pressure sensor for the Max Extreme remote mounted:
I've been working on a custom mount for the Max Extreme controller for the past few days. After a couple of different ideas didn't meet my needs, I finally found a way of mounting the controller that was clean and allowed easy removal of the dash. (Very important feature on a race car) Parts are currently getting painted, and I sent the dash to be dyed again. (It was starting to show some wear after probably 50 removals) Tomorow I'll be starting on the controller wiring.
PEI330Ci wrote:Your welcome, and thanks for the kind words.
I wish there were more threads like this too......
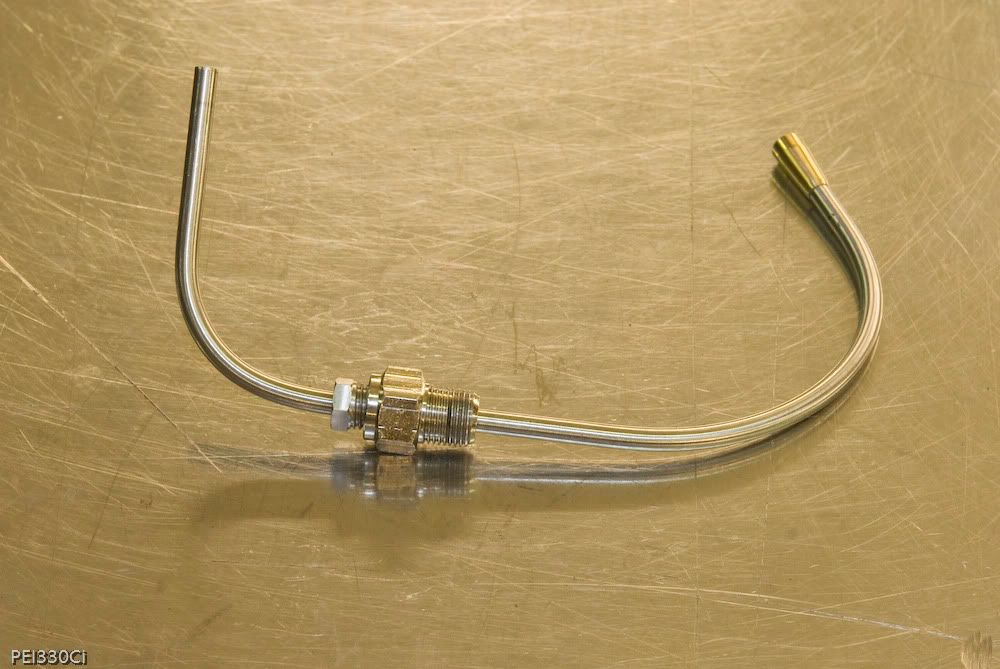
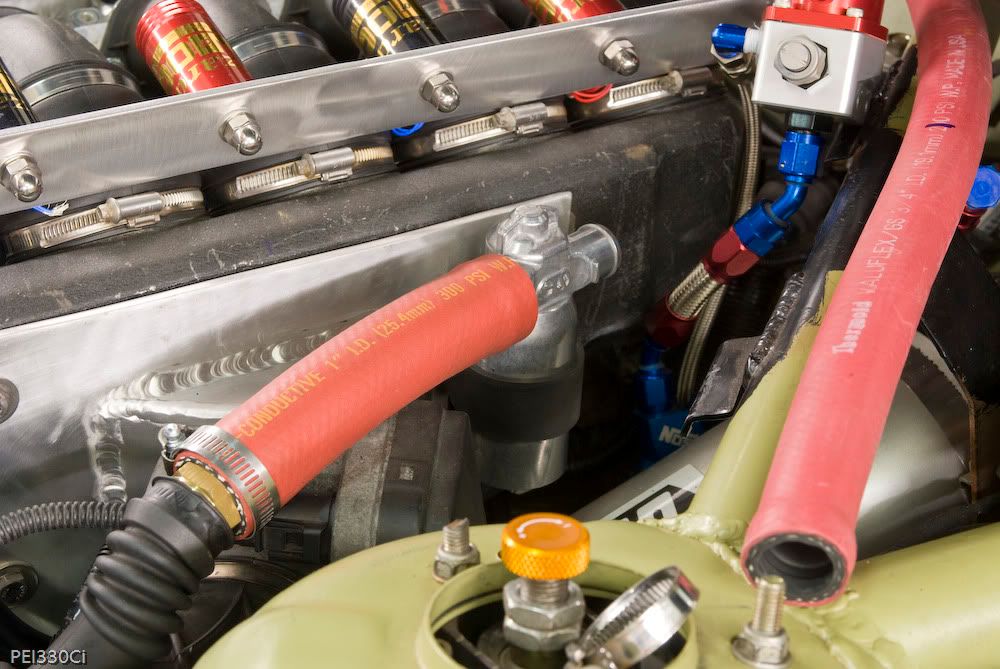
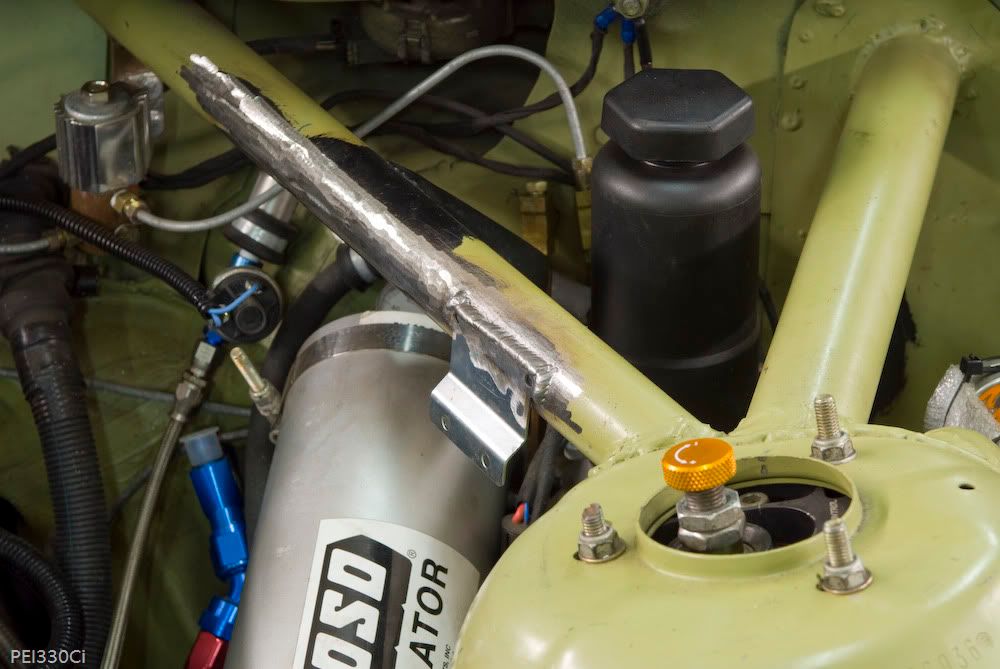
This is one of the feed lines that goes from the nitrous bottle to the nitrous distribution block:
Being that it will receive a lot of wear and tear in my particular application, I decided to add a protective sleeve to it.
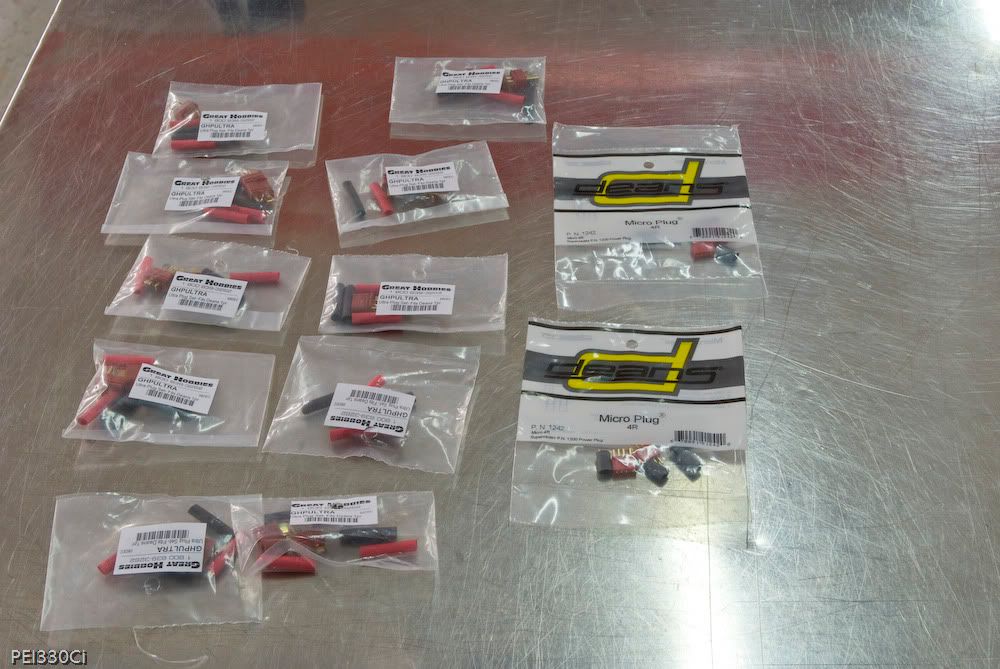
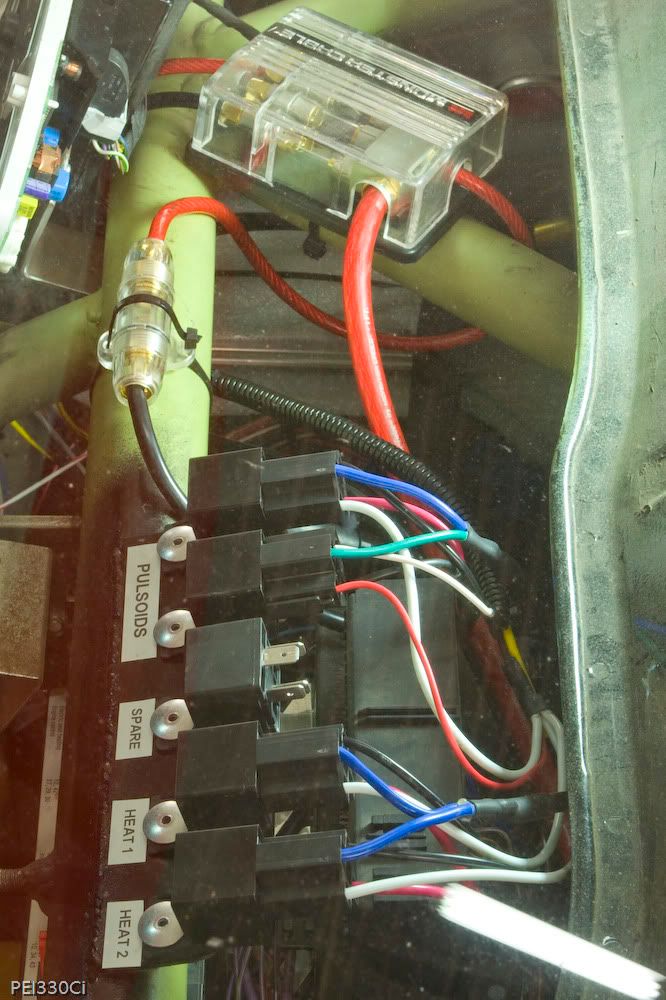
Power system upgrade:
80 amps of additional fused capacity have been added, as well as making it all easily accessable with the dash in place. (More on this later)
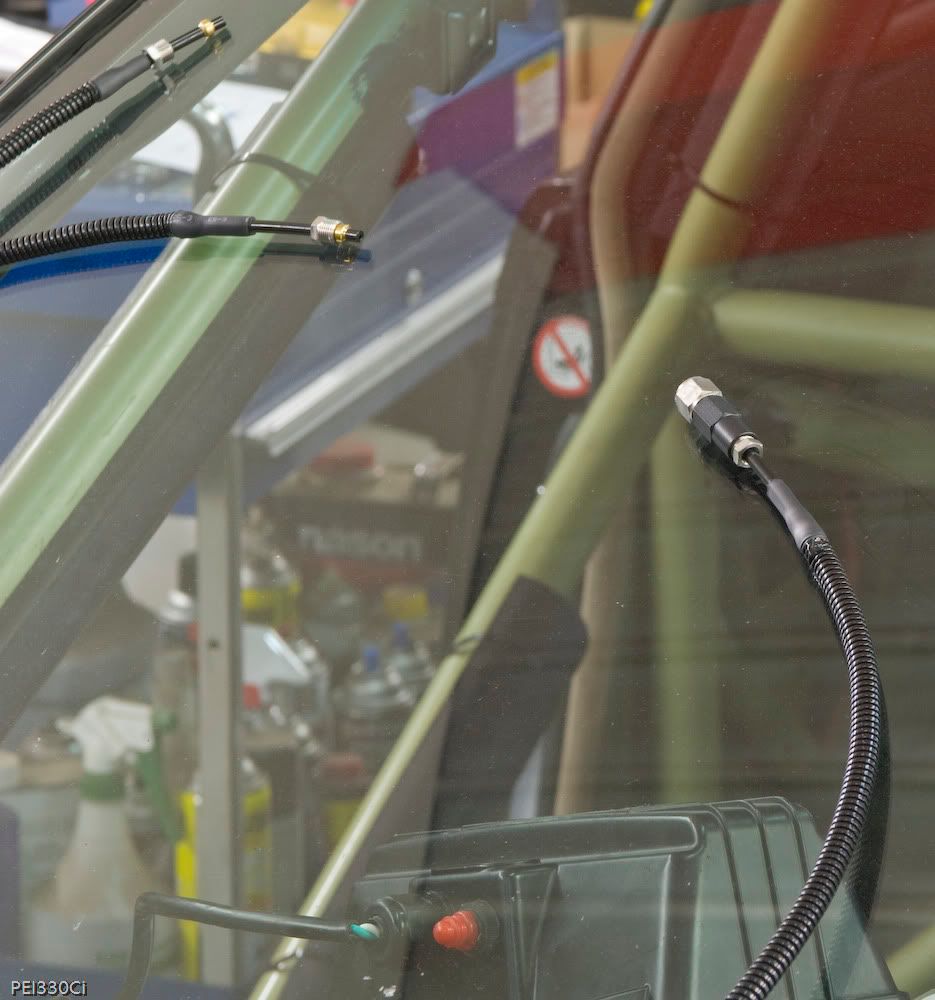
PEI330Ci wrote:Unless you are data logging at rates above 100hz, mounting the pressure sensor away from the regulator won't affect accuracy. One thing to keep in mind is that the entire fuel system is pressurized the same amount with the regulator in place. Under no load (No fuel consumption) you'll see the same fuel pressure back at the fuel cell output as on regulator. Under load, you'll start to see differences as flow restrictions start to take effect, but over all you won't see a big difference if the system has been designed properly.
On race cars, it's common practice to remote mount certain types of sensors to reduce fatigue from vibration. In my case, it's also just a lot more convenient to have the sensor and wiring out of the way in an area of high wear and tear. (The manifold will be removed a lot)
Over the winter there will be an additional fuel pressure sensor mounted close to the pulsoids to log the effects of pulsing. In that case, being close to the source of the fluctuation will be nessessary.
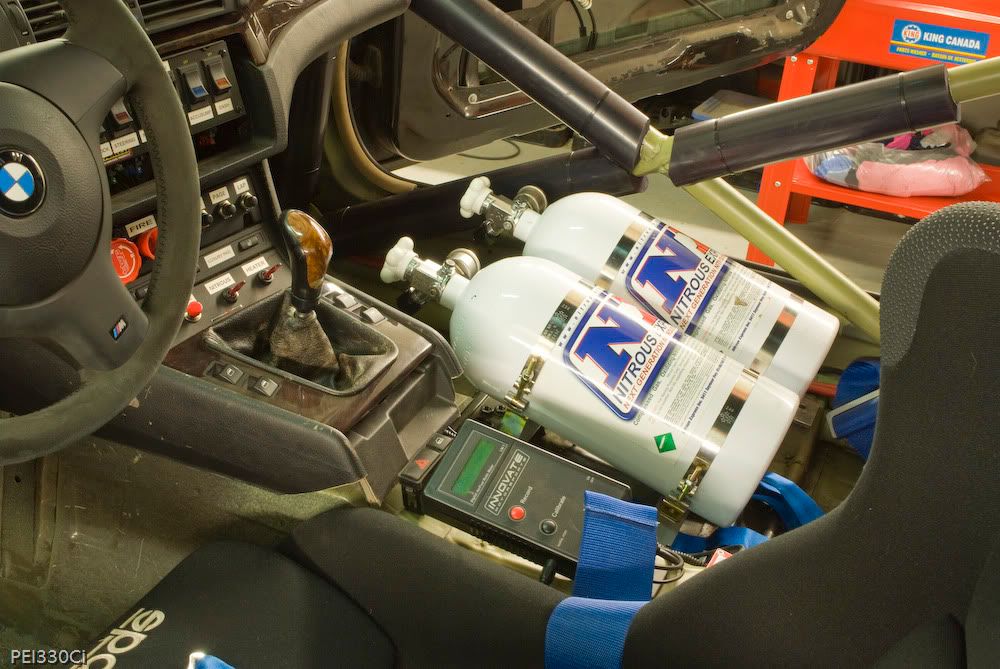
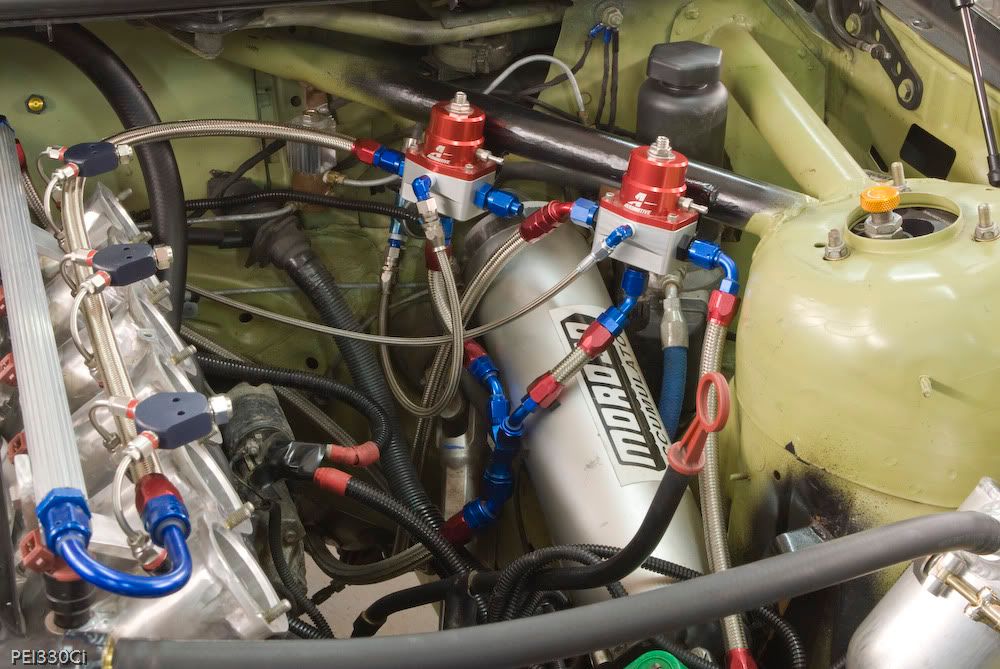
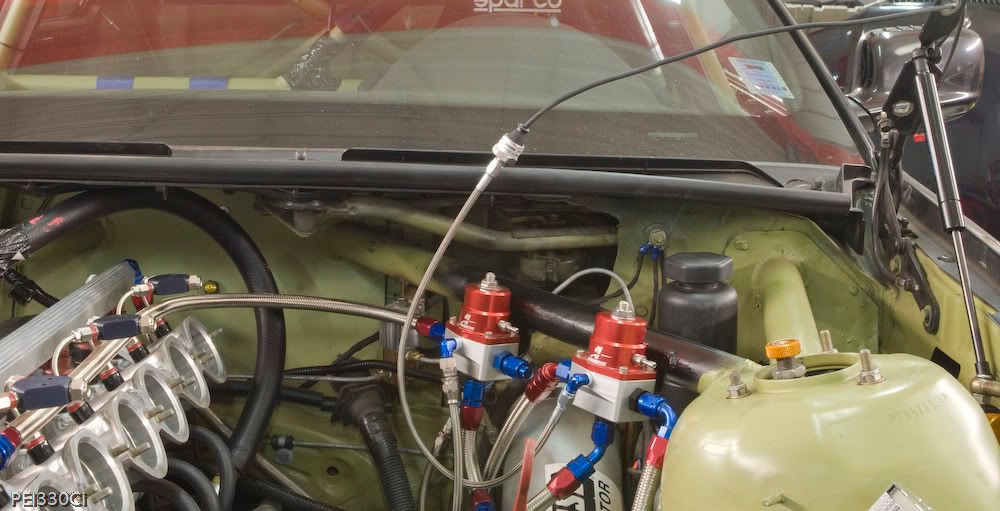
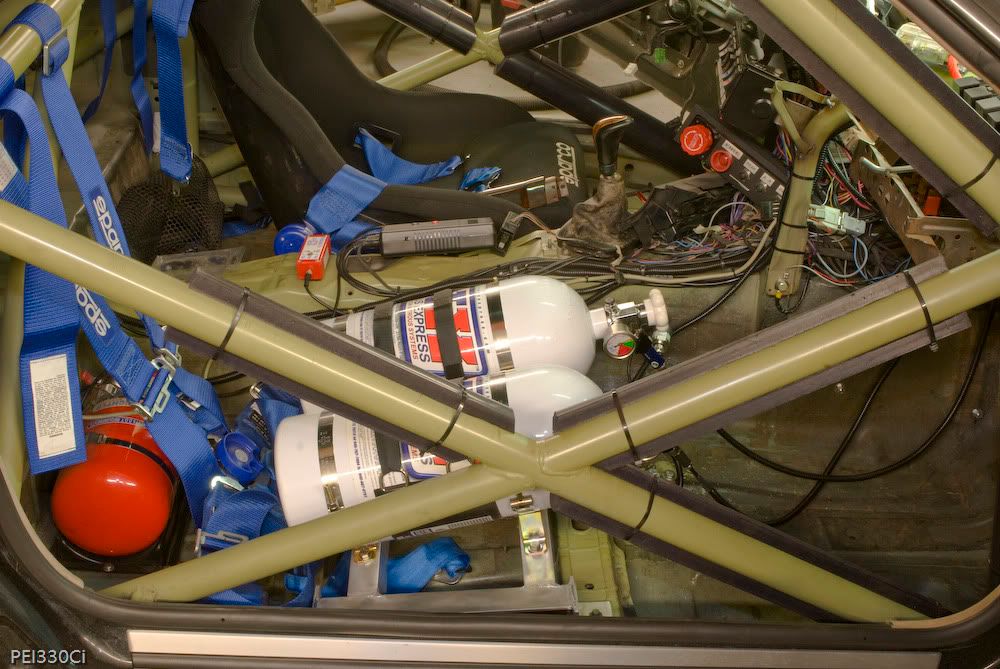
PEI330Ci wrote:Nearly 2 weeks later...the nitrous system is plumbed, wired, and ready to go.
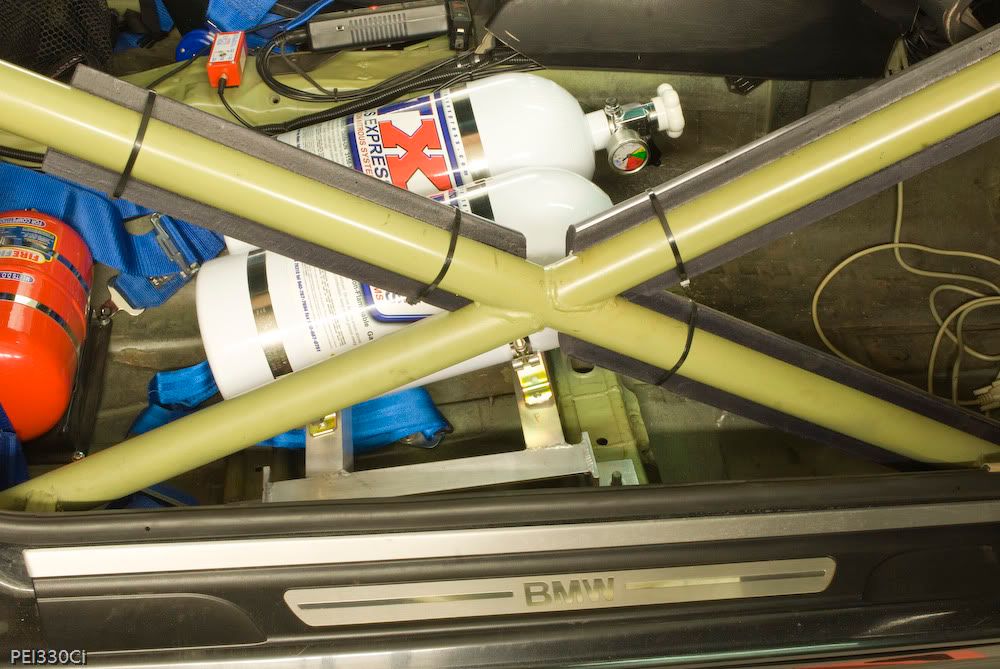
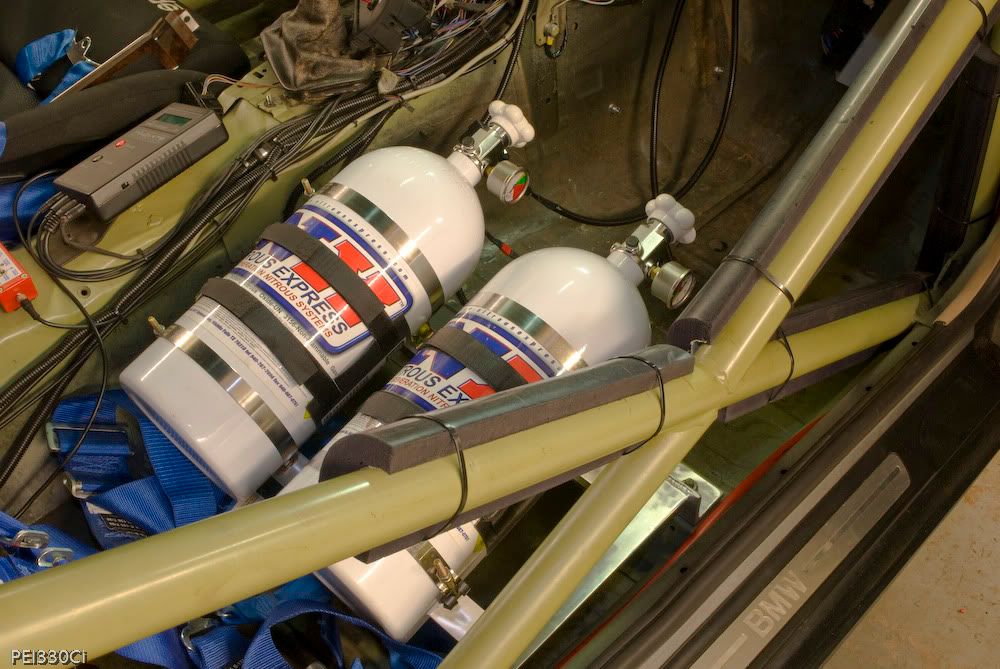
Nitrous bottles mounted:
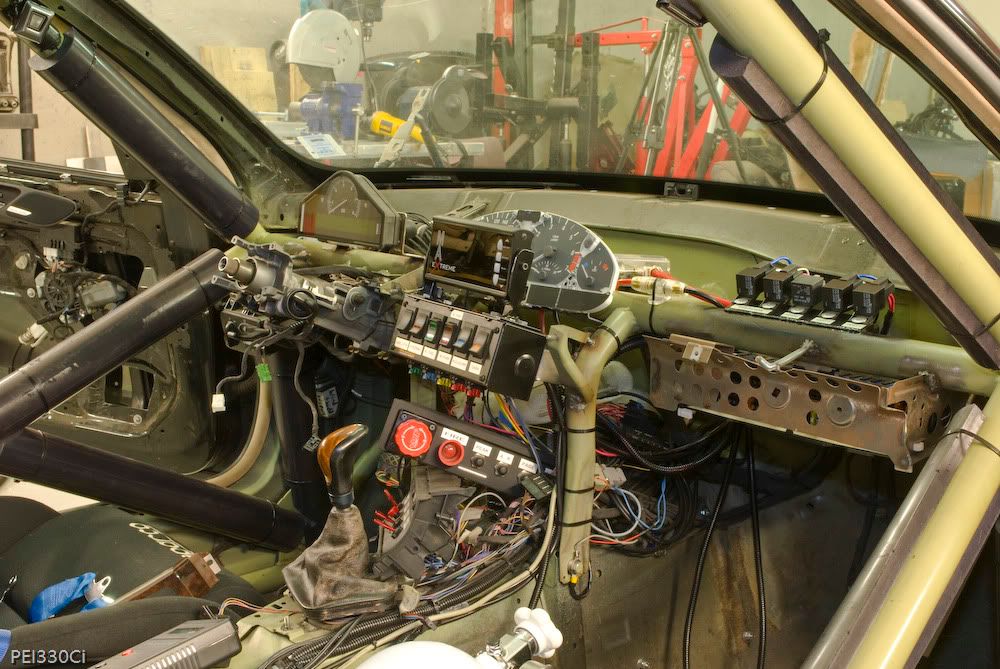
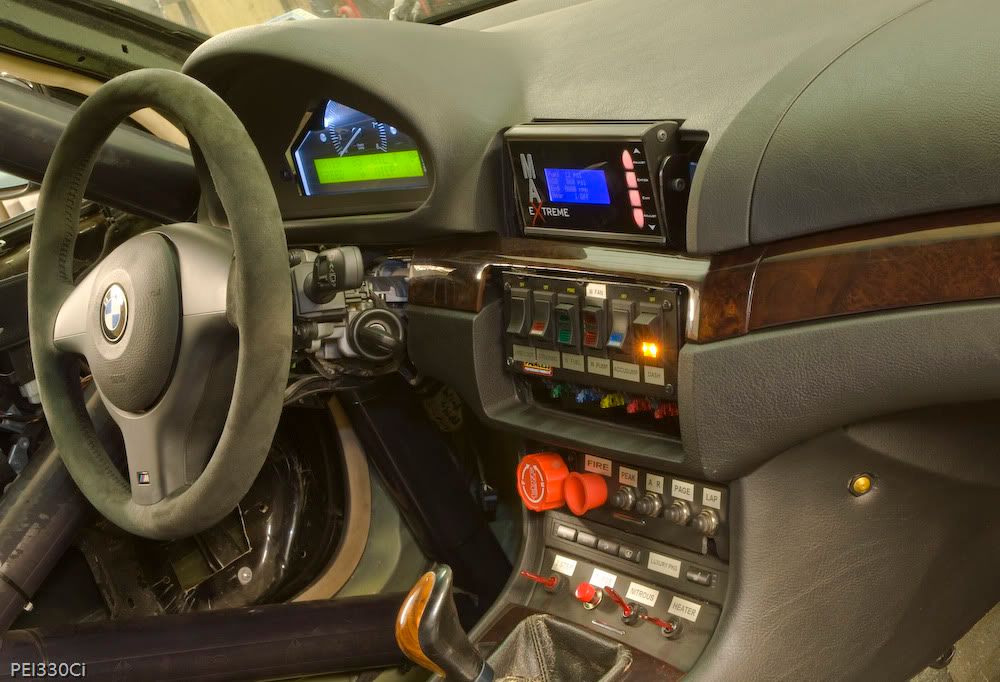
Max Extreme nitrous controller mounted and wired:
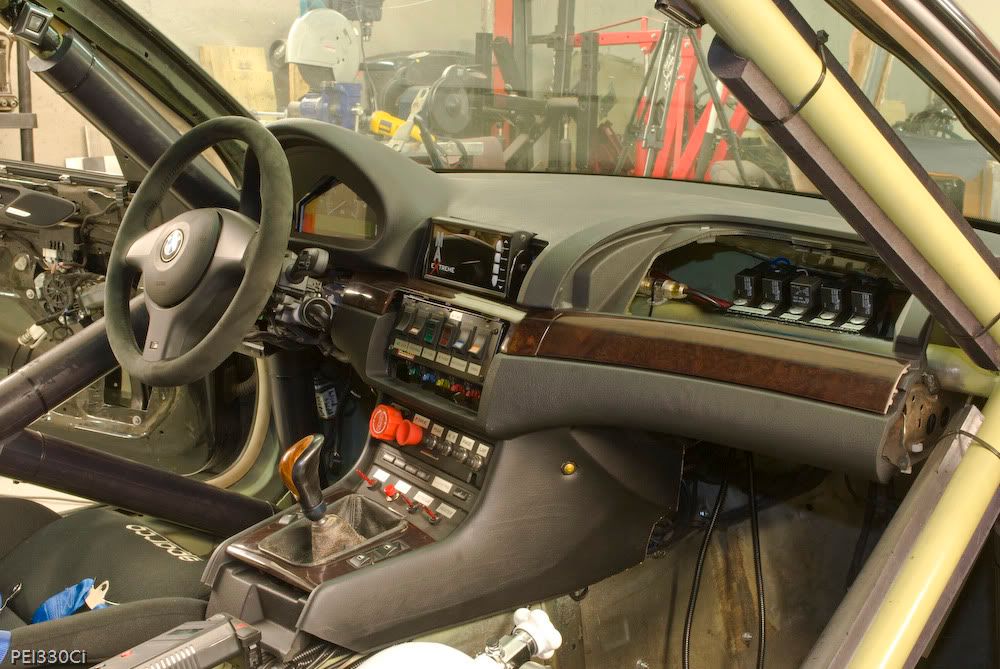
Dash installation:
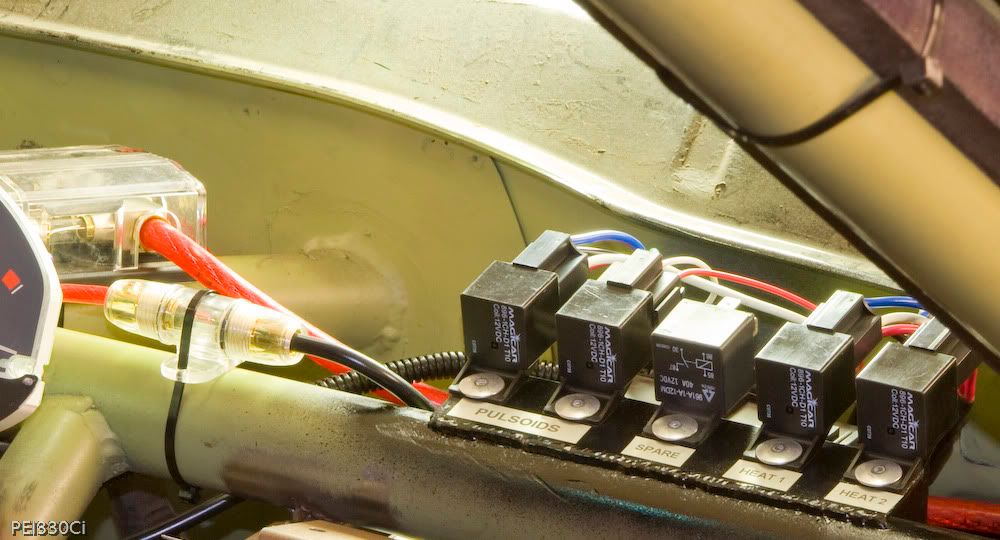
Relays and fuse blocks easy to access:
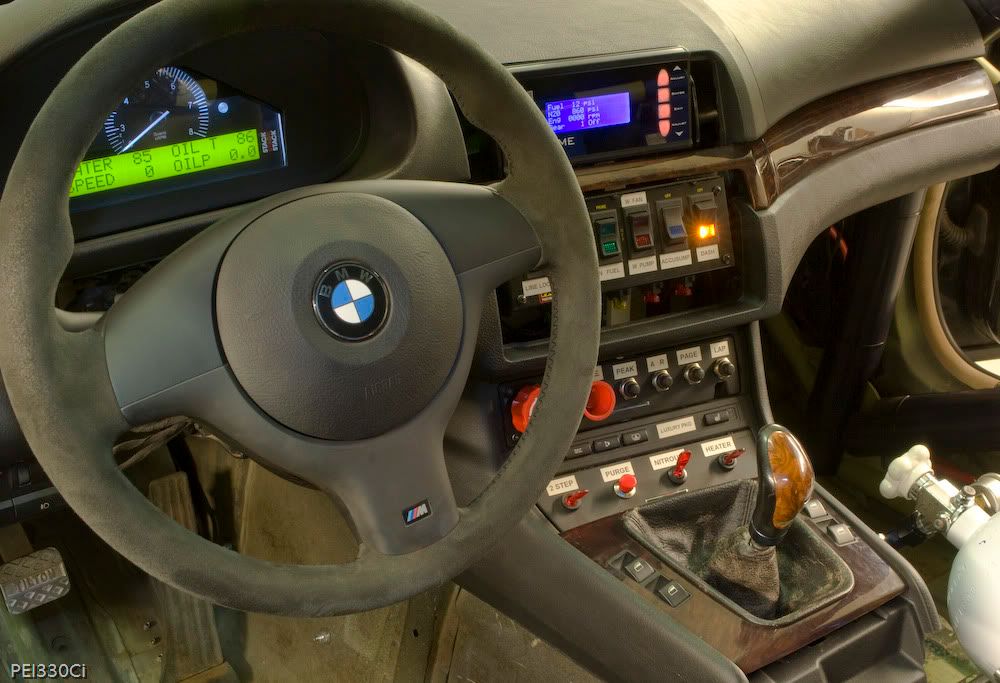
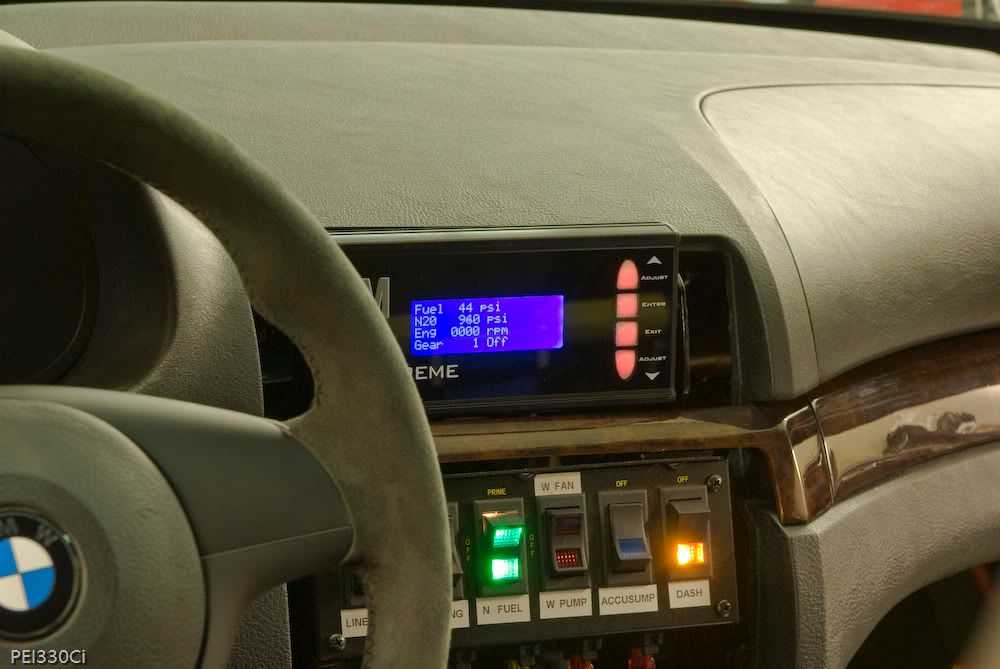
Dash electronics turned on:
Nitrous bottles open, and fuel pump on:
Tomorrow morning I'll start static testing of the system in the parking lot, then tomorrow night I'll be headed to the drag strip again.
The main purpose of the trip to the drag strip is to get the ECU fine tuned with the new intake plumbing/MAF placement. If every thing is working well, I'll start testing the 75 shot.
Later this week I'll be heading to the dyno to ramp up the jetting.


PEI330Ci wrote:Knock on wood.... :help
Thanks.
It uses a PWM signal, which is exactly like fuel injectors, but in this case the pulses are not timed to correspond with the intake cycle.
I'll be doing the same tuning that I'd be doing on the dyno at the drag strip. I can run 20 times in 2 hrs if I want to.
The N/A runs will be logged, and then I'll use those logs to fine tune for the new manifold. Once the N/A tune is good, I'll start using the nitrous in small bursts and use the logs to tune that. For example, a 50% hit in 2nd gear, then N/A the rest of the way down track.
The same as on the dyno, I'll keep increasing the amount of time the engine spends on nitrous as the tune gets better.
Running race fuel, 3 steps colder plugs, and pulling 4 degrees of timing is MASSIVE insurance that should keep everything safe.
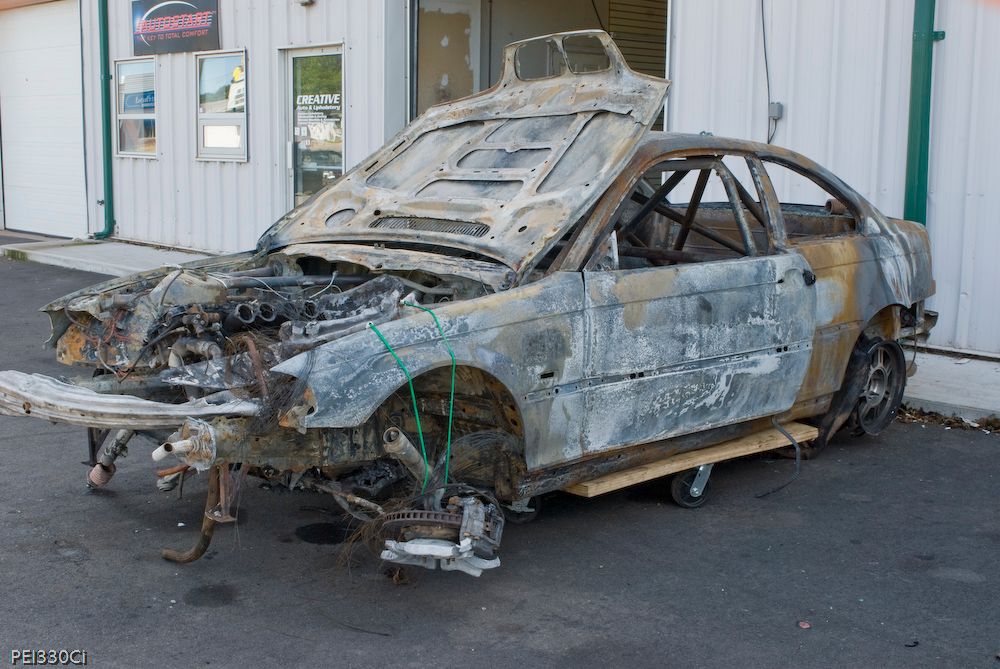
PEI330Ci wrote:The trip to the drag strip didn't go as well as planned. Exactly 1 hour after I started, the car was on the trailer.
Timeslips:
http://i36.photobucket.com/albums/e29/PEI330Ci/2009%20330Ci/August2009-125.jpg
The intermitent stutter under WOT wouldn't go away, no mater how I oriented the MAF. On the data log, it shows up as a rich spike at random RPMs in different gears. There was no logic to it. Still, the car ran 102+ MPH on the first 3 passes even with the random stutters and tall gearing. (2.93) DA was 2400 ft, ambient 95 degrees.
In despiration, I inserted a bypass plug on the Moristech Interceptor harness and the problem disapeared.
It appears that the stuttering has something to do with the Moristech, but I don't know what. Tomorrow I'm going to rewire some things and see if that helps. (I'm suspecting it's getting some interferance) The down side to disconnecting the Moristech was that I lost my "tune", and the car lost power. AFRs were lean in the midrange, and super rich above 5500 RPM, and I lost 4 degress of advance. Still, as you can tell from the passes made at 19:28 and 19:33, the car ran better overall.
The last pass at 19:37 was to be the first nitrous run with the WON system. On launch the clutch didn't grab very well, and shifting into 2nd gear it started to slip bad. 3rd gear was worse......so I drove it to the trailer and called it a night.
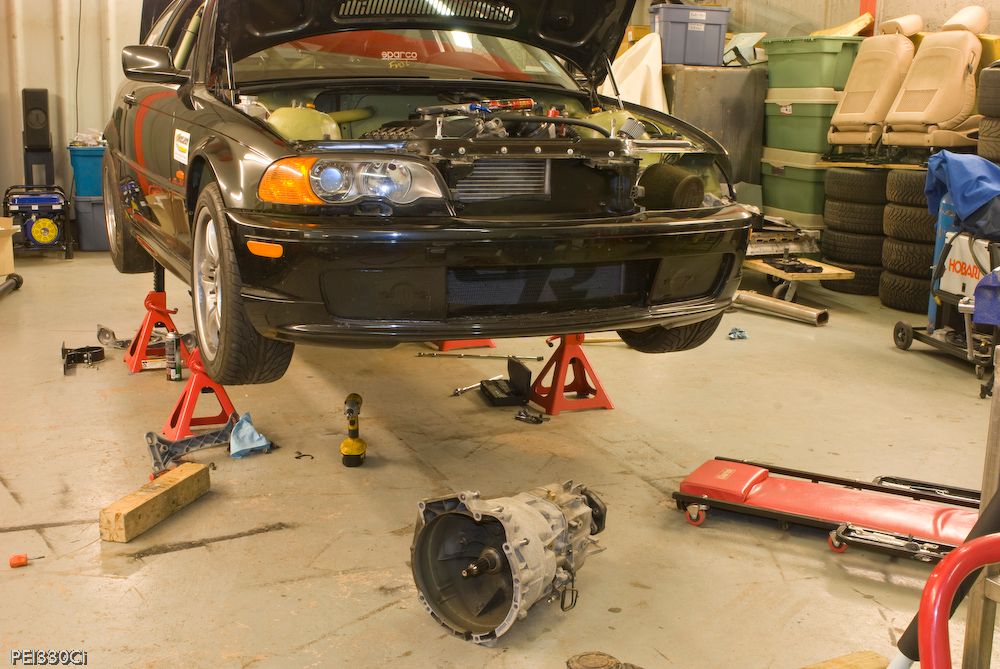
Here's the car this afternoon:
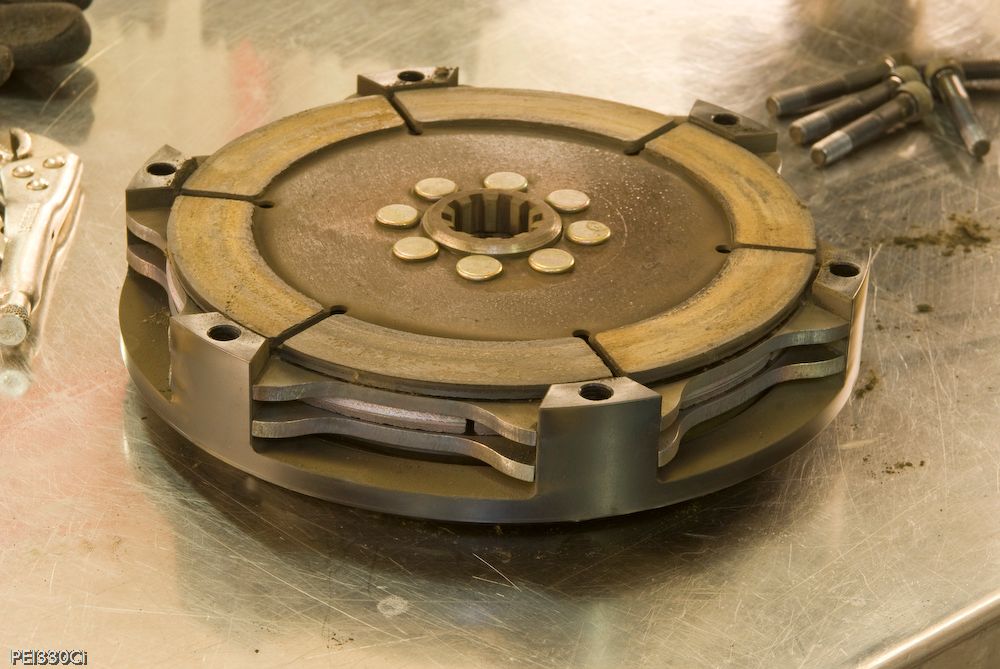
The clutch pack:
The top friction disk is kevlar, the bottom friction disk is ceramic. This combination is rated for 700 HP under normal driving conditions. My abuse on the drag strip was anything but normal....and the wear on the kevlar disk shows where most of the abuse ended up.
A quick call to Bimmerworld, and Jay had a pair of Ceramic plates being rush shipped for arrival on Friday. Once again, Bimmerworld comes through in a pinch.
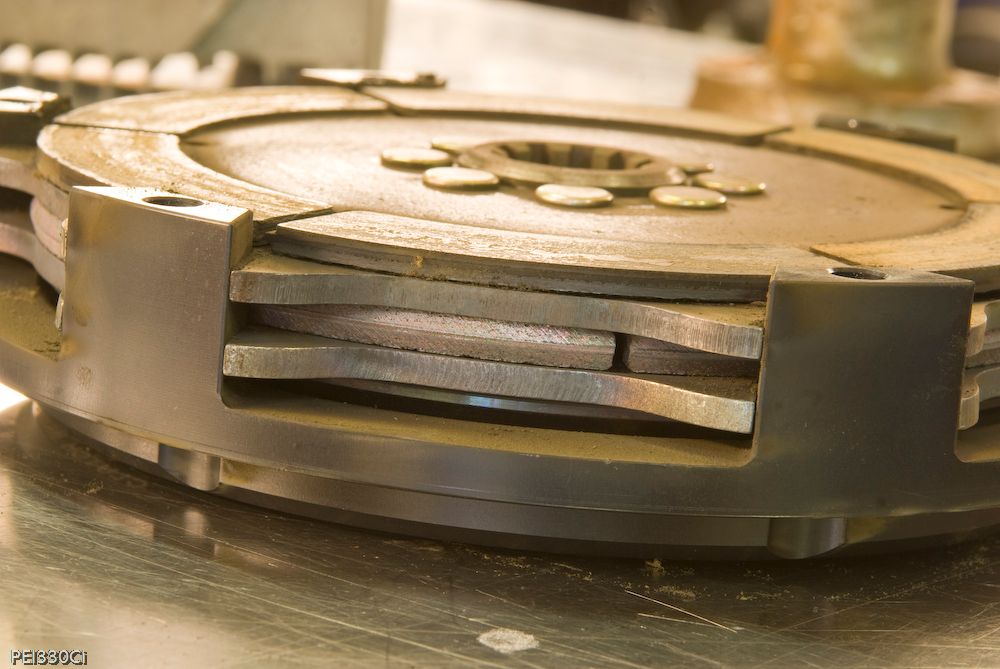
Here's where all that kevlar ended up:
I don't think the 2.93 diff helped the cause at all, as I was slipping it hard against a 5000+ RPM flywheel for at least 1 second per pass. Even then, with perfect traction, I could only muster 2.0 60 fts.
Some other good news: The 4.10 is fixed and will be back in the car when the new clutch plates arrive.
I should be back at the track this weekend, and if not, on the dyno.
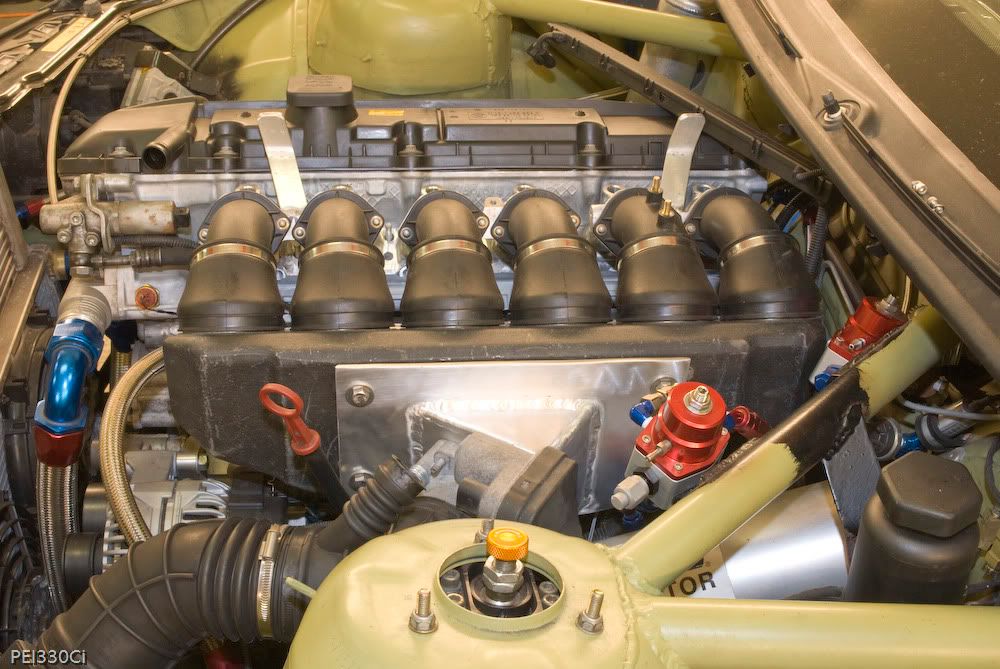
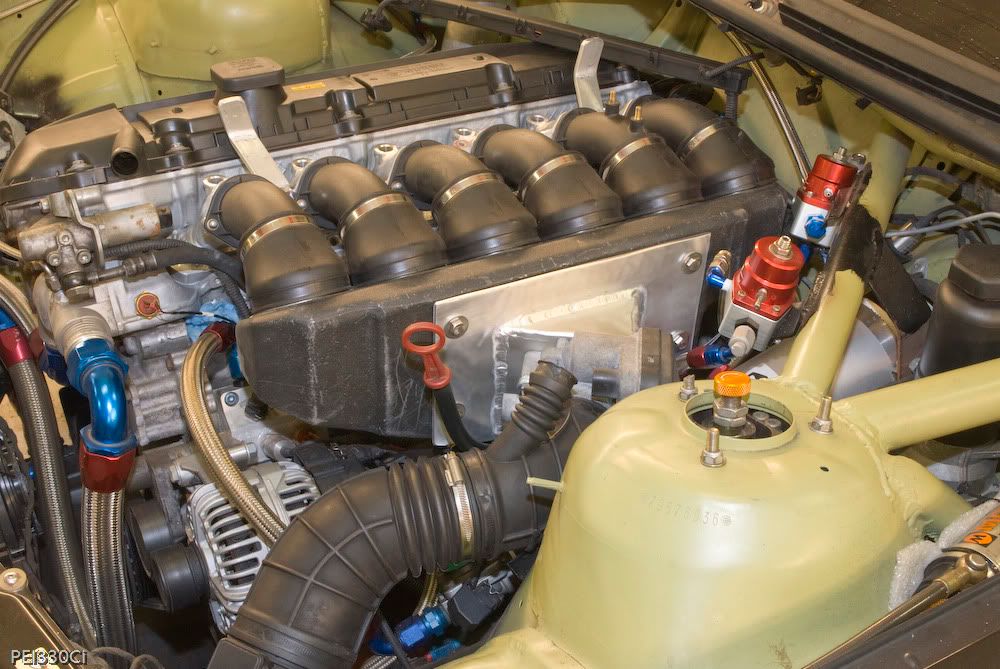
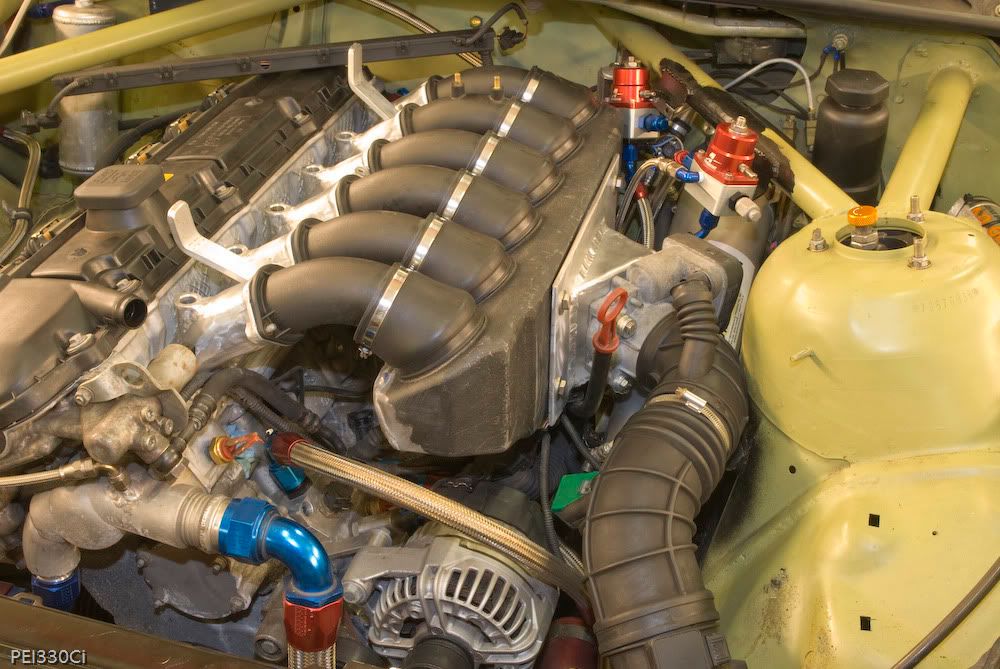
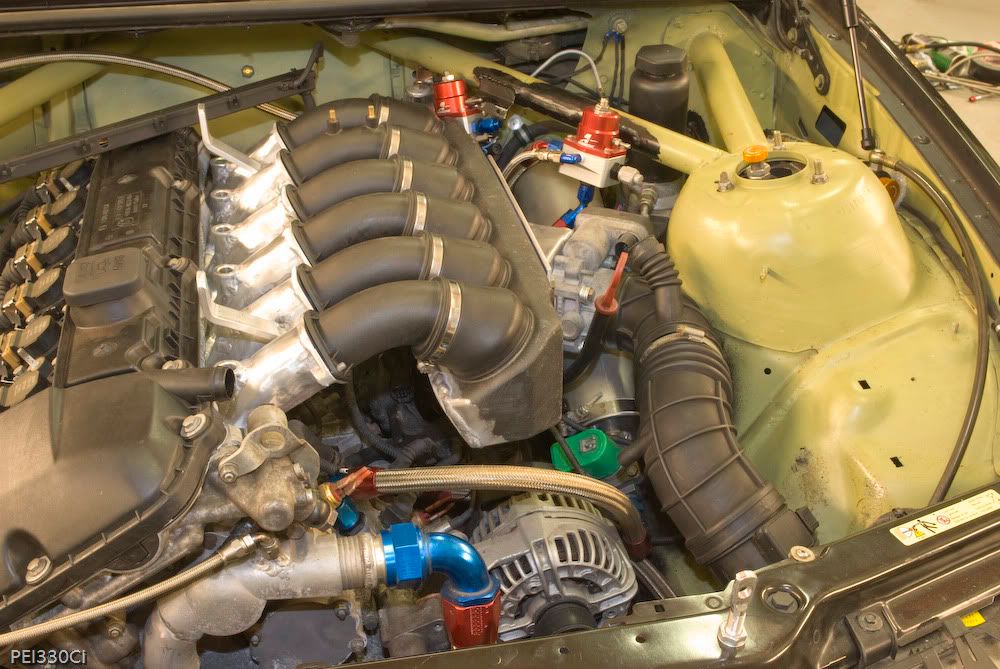
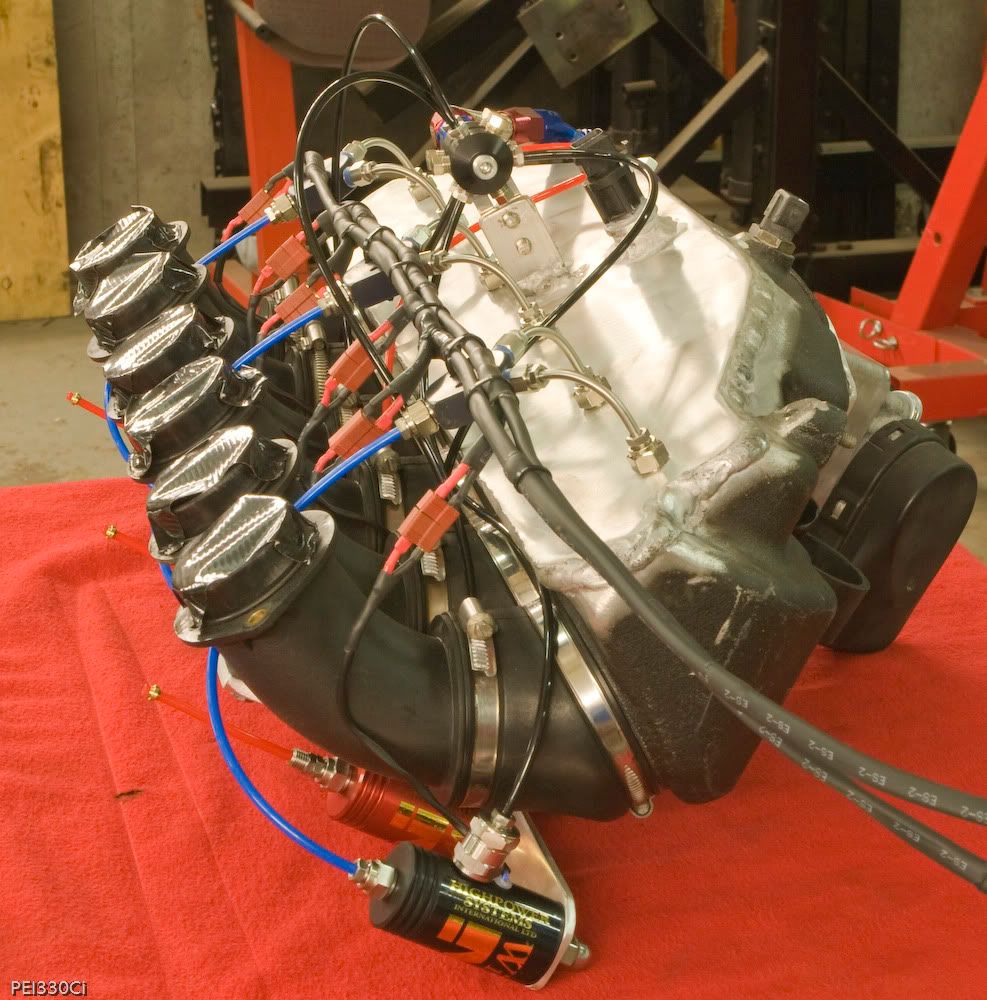
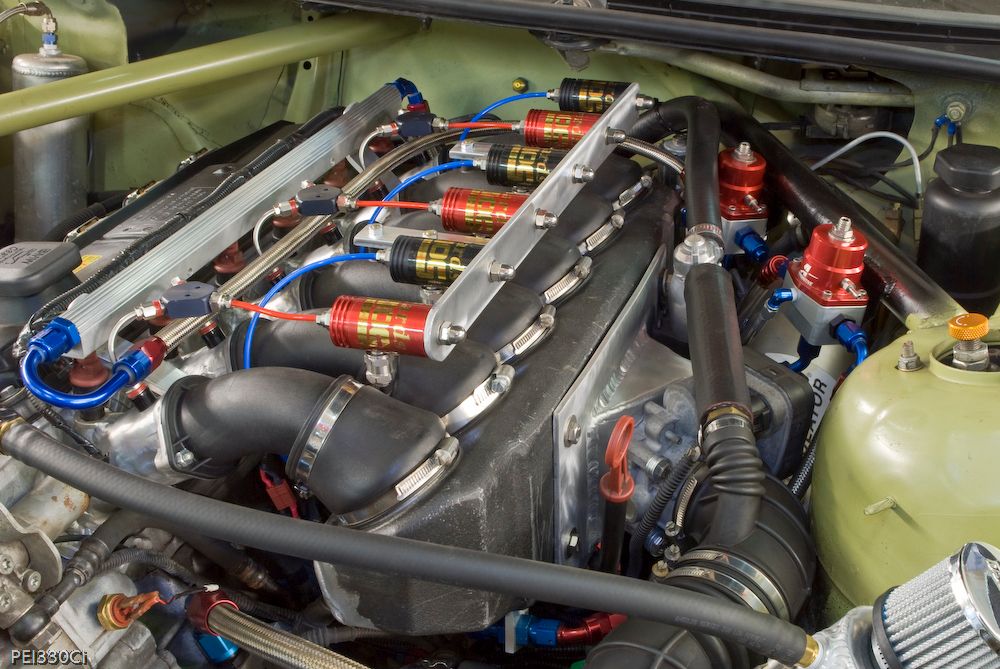
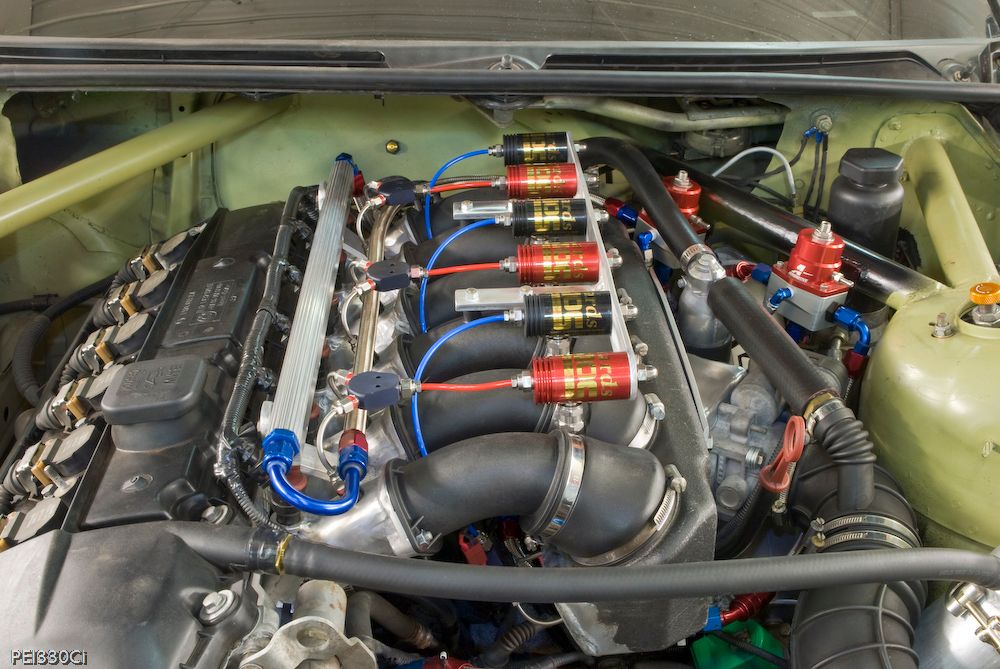
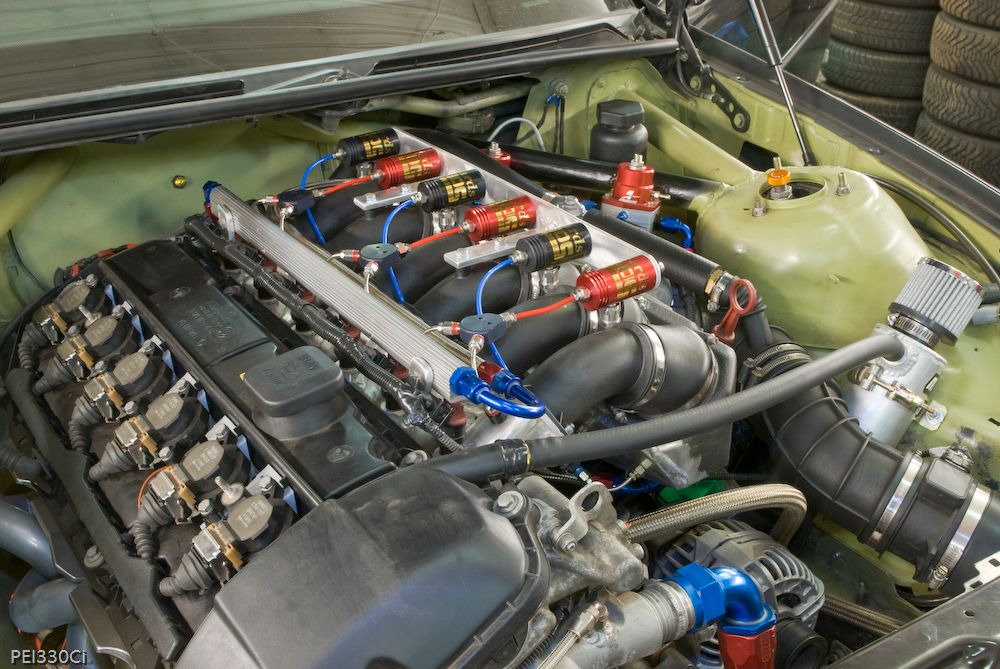
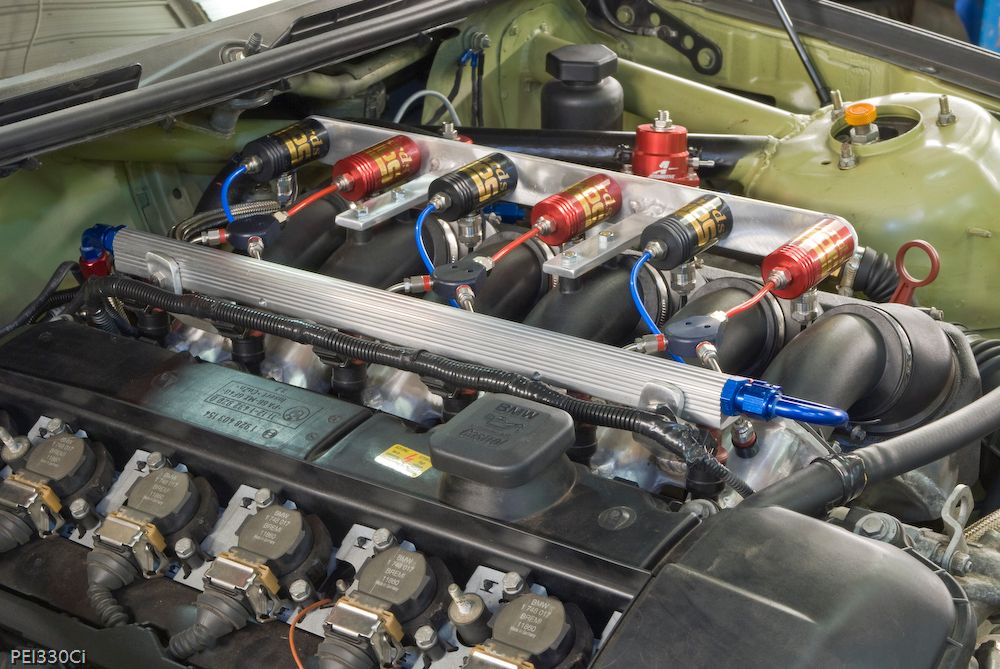
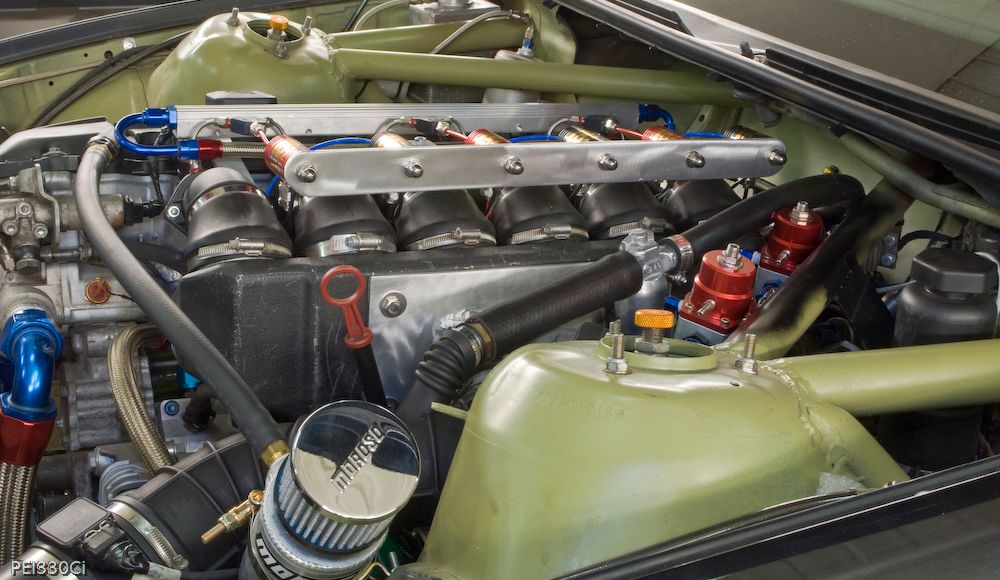
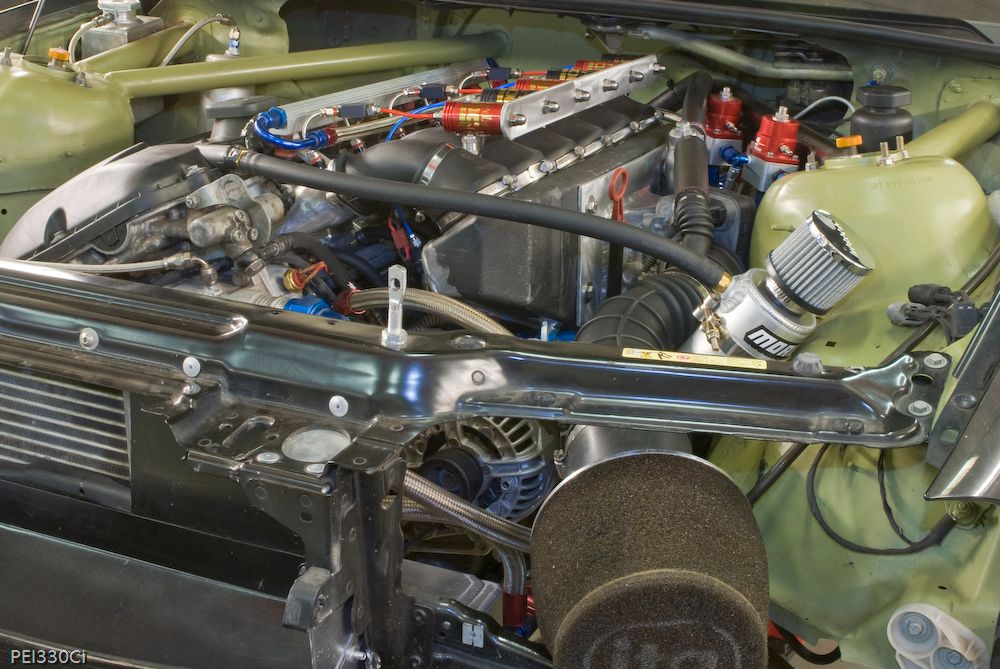
PEI330Ci wrote:I've been trying to setup a photoshoot outside to show the finished engine compartment, but the weather hasn't cooperated. Until then, here's what she looks like:
I just dumped 10 gallons of C12 into the fuel cell, and topped up all five 10Lb nitrous bottles. Providing the clutch parts arrive tomorrow, I'll be off to the track/dyno for the weekend.

PEI330Ci wrote:Thanks guys....just finishing up the clutch change.
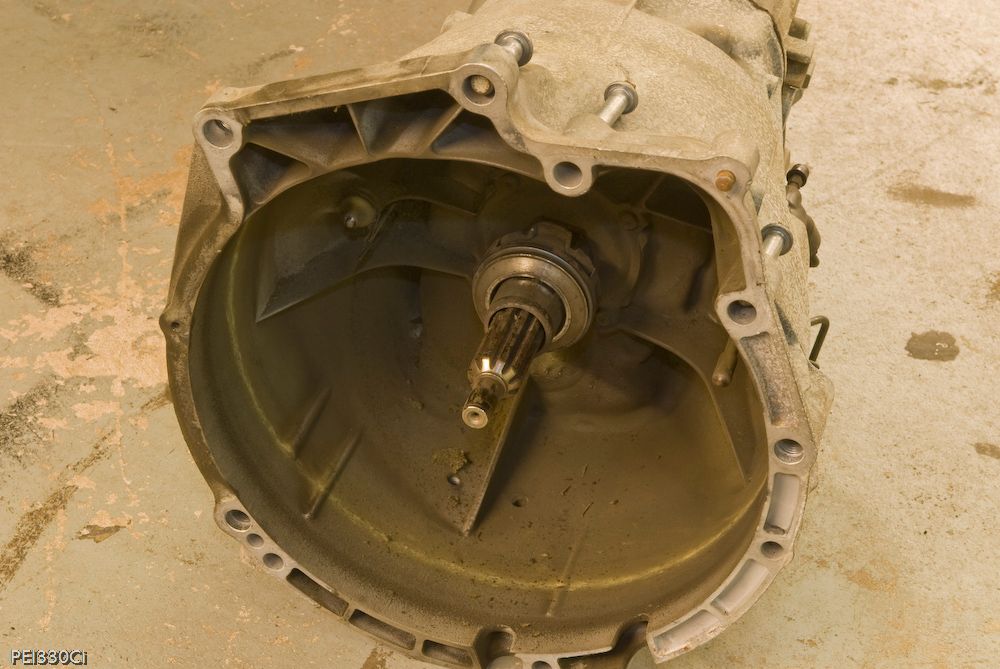
Something that isn't obvious is that I made all the wires and fluid line connections to the engine "floating" so that I could tilt the engine to remove the transmission. It's paid off BIG TIME.
The only crappy thing is that I don't have a trans jack yet, so I had to lift the trans back into position by hand.
I'm here at the shop by myself today as well....so it was a little scary....


